Yarn labels can be daunting for the novice knitter. Luckily, they have become fairly well standardised, so once you can decipher one, you can read most of ’em.
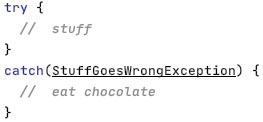
A typical ball of yarn
Typical yarn label brand and name info
The pic above shows brand “Artesano” and name “Superwash Merino”
Detailed ball band information
Typical yarn label detailed information
Showing 1. fibre content, 2. weight, 3. manufacturing details, 4. care information, 5. gauge information, 6. yardage, 7. needle info and anything else the yarn company want to tell you.
The gauge is probably the most important piece of information. A DK weight yarn like this one will typically knit up so that a 10cm wide piece of knitting will be 22 sts, and a 10cm long piece of knitting will be 30sts. Or, as usually written, 22 sts x 30 rows = 10cm over stocking stitch. That grid symbol is used a lot, so look out for it on other ball bands.
Prising the ball band out so you can check ALL the info
Typical yarn label colour information
This pic shows colour/shade number and dyelot number.
Some manufacturers put critical info like tension right at the end of the label, inside the ball, I’ve no idea why! Check it’s okay with the sales assistant first before you take the ball apart – they might have all the info you need in a folder or on a colour card (a card with a small sample of the yarn on it in each of the available colours). Don’t be afraid to check all your balls are from the same dyelot.
Hope this helps!
Got a weird ball band you can’t decipher? Send over a pic and I’ll try decipher it for you!
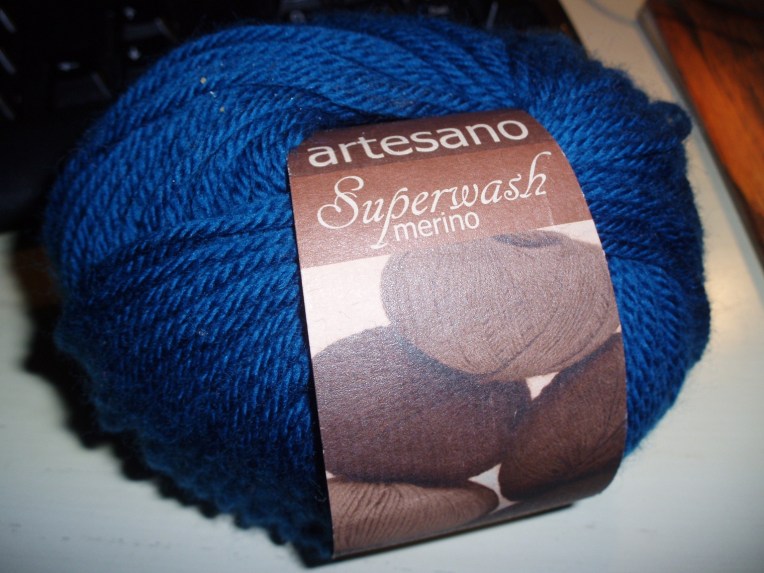
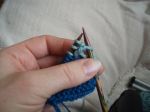
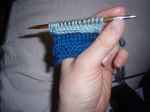
This is a combination of I-Cord cast on and bind off such that the fabric appears uninterrupted except for a horizontal I-Cord.
At the beginning of a RS row, cast on 3 stitches.
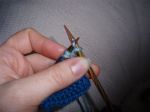
*Kfb, k1, k2tog, slip last 3 sts back onto LH needle, repeat from * to end of row.
In the pictures below, the I-Cord is knit in a contrasting colour. There is no reason why you can’t use the same yarn throughout, this was just for demonstration purposes.
Start on the RS
Cast on 3 sts
K front and back
Now K1
k2togtbl
Pass 3 sts back to LH needle
Continue to end of row
Continue as before
You will have added 3 or 4 extra sts (depending when you stopped). On the next row, slip the extra sts over the following st to get back to the correct number of stitches for your pattern.
The sts on the needle after making the I-Cord tend to be loose. You can tighten them up by twisting the stitches as you work them.
Last night I popped up a formula for calculating the stitches on a particular row in the cap of a set-in sleeve. And I kind of just left it there, with no explanation. My excuse is my eyelids were sticking to my eyeballs from lack of sleep.
So, now let’s not talk about knitting or maths at all and go on to glass production.
Way back when, if you wanted a pane of glass, you got a glass blower to spin a disc of molten glass. The disc would be cut to shape when it cooled and every pane would have a pontil mark from the glassblower’s pipe. (circa mid 1700’s)
In 1953, the Pilkington brothers developed the float-glass method for making flat glass.
In between, if you wanted flat glass without a pontil mark, your blower would blow up a cylinder, knock off the ends and cut the still malleable glass up one of the sides. He then opened and flattened the cylinder into a rectangle. It never went completely flat, which is why some old glass looks “wavy”.
Glass cylinder to flat rectangle
Sleeves at their most basic are cylinders. If you knit one flat, you make a rectangle just like the glass cylinders above. Now, scale it up just a teensy bit, and a sleeve can probably be better approximated by a truncated cone intersecting a plane. Unless you’re making a cap sleeve, the armhole is also a closed curve. Hence, it’s an ellipse. Just needs a bit of chopping up to get it flat.
A set-in sleeve on a pattern schematic looks like the below. (Actually, usually they’re a bit wider, proportionally speaking).
Set-in sleeve cap
Now, the equation I came up with last night is pretty much the same as the one I gave for knitting a circle. If you use it in the same way, you will knit an ellipse. Here’s that ellipse one again:
This reads “the number of stitches on row n is a (measured in stitches) by the root of (1 minus (the row number by the gauge over b (measured in stitches)) squared)”
a is half the width of the ellipse and b is half the height.
gauge is sts/10cm over rows/10cm
This will give you the stitches for a quarter of the ellipse (i.e. the curve in the positive x & y quadrant on the cartesian plane), you need to double it to get the stitch count for an entire row and mirror it to get the corresponding bottom half of the ellipse (where y<0).
However!
We want to do set-in sleeves. We’re not actually knitting an ellipse, we’re knitting the cylinder from which an ellipse has been cut, i.e. the negative space of the ellipse.
So the sleeve circumference at its widest point (usually, unless you’re doing a bishop or bell, more on that to come!!!) is usually at the bicep (check out this knitty winter ’04 feature). Call this circumference cAssuming a sleeve which is the same width as the armhole at the intersection (i.e. straight, not a puffy sleeve with extra material), then a is c/4. b is half the depth of the armhole. Very important note: these are the measurements of the fabric, not the model.
Assuming bottom-up construction, the sleeve width just as you are about to start decreasing for the sleeve cap is c. Set n = 1 and increase by 1 for each row. The rowcount decreases at a rate of to the midpoint of the set-in curve, when . Then, the rowcount continues to decrease, and the simplest way to calculate it thereafter is to just reset n=1 and use
So that’s my convoluted THEORY. Need to knit it up and see if it works! I’ll update again when I do.
This, I believe, is a formula for calculating the number of stitches on a row for the sleeve cap of a set-in sleeve, given a = half the width of the armhole, b = half the height of the armhole.
I shall write more tomorrow, I haven’t sufficiently explained how to use this to get a complete set of rowcounts for the sleeve cap. When it’s done though, I’d be interested to see if knitters out there concur.
1) Starting at a corner and increasing at each end. This will make a triangle. The inverse is to decrease at each end.
2) Starting straight and tilting the knitting by increasing at one end and decreasing at the other. This will make a parallelogram.
__________________
Angles of increase
Let’s take a look at increasing angles when starting in the corner.
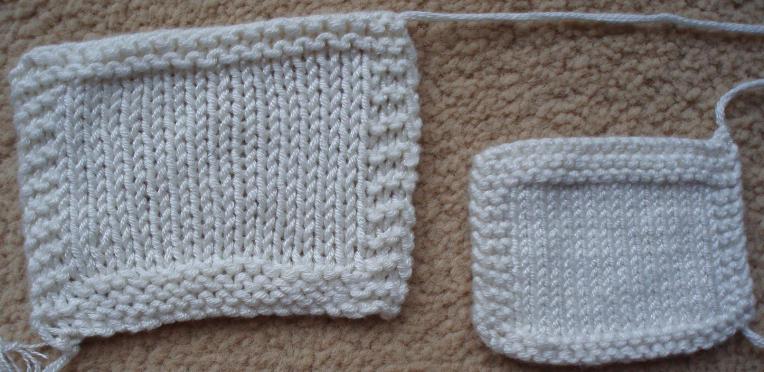
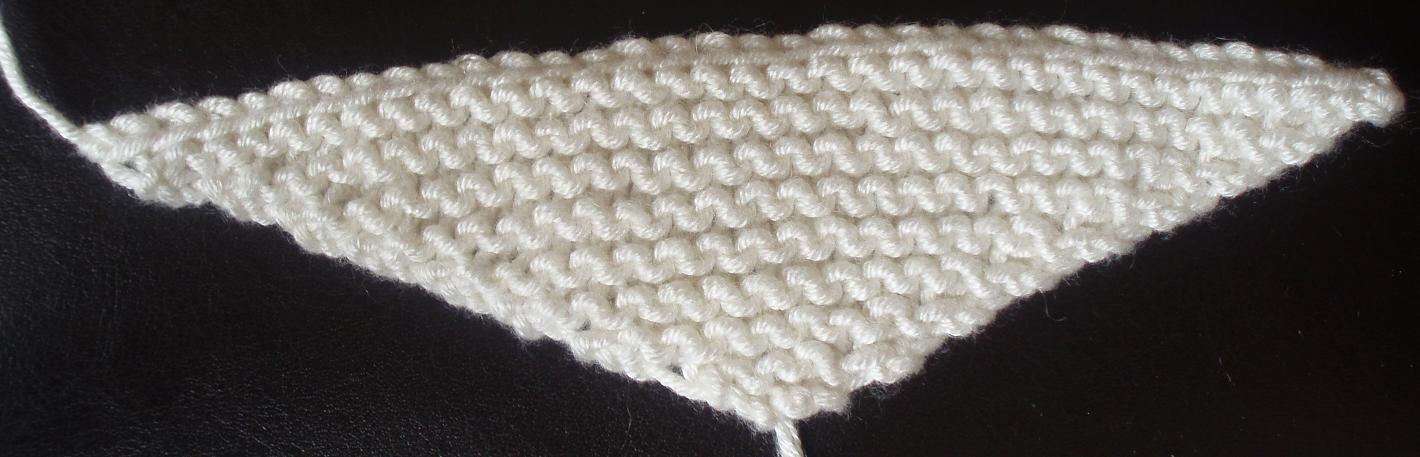
The following swatches have all been made by casting on two stitches and proceeding in garter stitch. The swatches vary in the number of stitches per row that are increased. The increases were made by knitting into the front and back of the stitch.
Swatch A: Increase in the first and last stitch on every row. This gives an increase rate of 2 per row. See how quickly the swatch widens. This swatch widens rapidly to make a 130° angle (approx, I’m using my kid’s school protractor to measure it). It would be great for a shawl or scarf.
Swatch B: Increase in the first stitch in every row. This is an increase rate of 1 per row. This creates a very nearly 90° angle. Good for panels and squares.
Swatch C: Increase in the first stitch on every 3rd row, or .33 per row. This widens slowly. It might be a good rate for triangular inserts in a swirly skirt. Approx 30°. This is probably too narrow for bunting flags. I’d estimate an increase rate of .5 would be better for bunting.
Swatch D: Increasing on one side of the fabric only, once every other row. This gives an increase rate of .5, however it’s all on one side, so the gradient is the same as at each side on swatch B, i.e. approx 45°
Swatches knitted up in Sirdar Flirt on 3.75mm needles.
Do not turn the work whilst making the i-cord cast-on. When you do the kfb, keep the yarn quite taut as this is where the i-cord closes in on itself.
Cast on 3 stitches then *kfb, k2. Slip 3 sts back onto LH needle and repeat from * until you have two stitches less than the required number of stitches on the RH needle, and 3 stitches still on the LH needle.
kfb
Place the last two remaining stitches on a stitch holder, or tie them up with scrap yarn. When it is time to finish the garment, use the tail of the cast-on to sew in these two stitches to the beginning of the i-cord cast-on. This will help make it look like the i-cord is continuous all around at the cast-on edge.
On the next round, if you find the stitches created are a little large, work into the back of each stitch to twist and tighten it.
I-Cord Bind-Off/Cast-Off
Cast on 3 stitches then [k2, k2togtbl, sl3 back to left needle], repeat as required.
Ribbed grafting is similar to Kitchener stitch except it’s worked across a ribbed fabric. One way to do ribbed grafting is to work as for Kitchener, then when you reach a purl section, pass the thread through to the other side, flip the work over and continue. I prefer just to work across.
Unfortunately, because the ribbing is worked in two opposite directions, the join can’t be perfect. There will be a slight jog of half a stitch. This doesn’t show in stockingette grafting as the “V’s” can be said to point up or down, depending on which columns of “legs” you examine.
Here I describe how it works for 2×2 ribbing, starting with a single knit stitch, though you could generalise it for any width ribbing.
Note: Don’t pull your grafting stitches too tight as you go. You can pull on the loose loops to adjust the tension to match your work afterwards.
Arranging your work as if to do Kitchener grafting, i.e. with live stitches on a “top” or “back” needle, T, and live stitches on a “bottom” or “front” needle, F, set up the grafting in the usual way:
1)Insert your tapestry needle into the first stitch on the front needle as if to purl, then pull the yarn through and leave the stitch on the knitting needle. I will notate this as Fp
2)Next go through the first stitch on the top needle as if to knit, leaving the stitch on the needle. Tk
Continue with step 3 below. This box explains my notation using ordinary grafting as an example.
Usually, Kitchener stitch continues with the following four steps:
Fk/, Fp, Tp/, Tk
Where “/” means “slip the stitch off the needle”.
You could read these four steps as
– go knitwise through the first stitch on the front needle and slip it off,
– go purlwise through the new first stitch on the front needle and leave it on,
– go purlwise through the first stitch on the top needle and slip it off,
– go knitwise through the new first stitch on the top needle and leave it on.
Repeat as necessary.
All Kitchener stitches are knit stitch to knit stitch (k -> k). I.e. you graft the second half of a knit stitch and the first half of the next knit stitch to their counterparts on the other needle. Ribbed grafts may be second half of a purl stitch with the first half of a knit stitch, or (p -> k), etc.
But with 2×2 rib, it’s a teeny bit more complicated. I hope my notation simplifies it a little!