Swatching in the round

In case you’ve not seen this neat way of making a swatch for an in-the-round project, here’s how to do it.

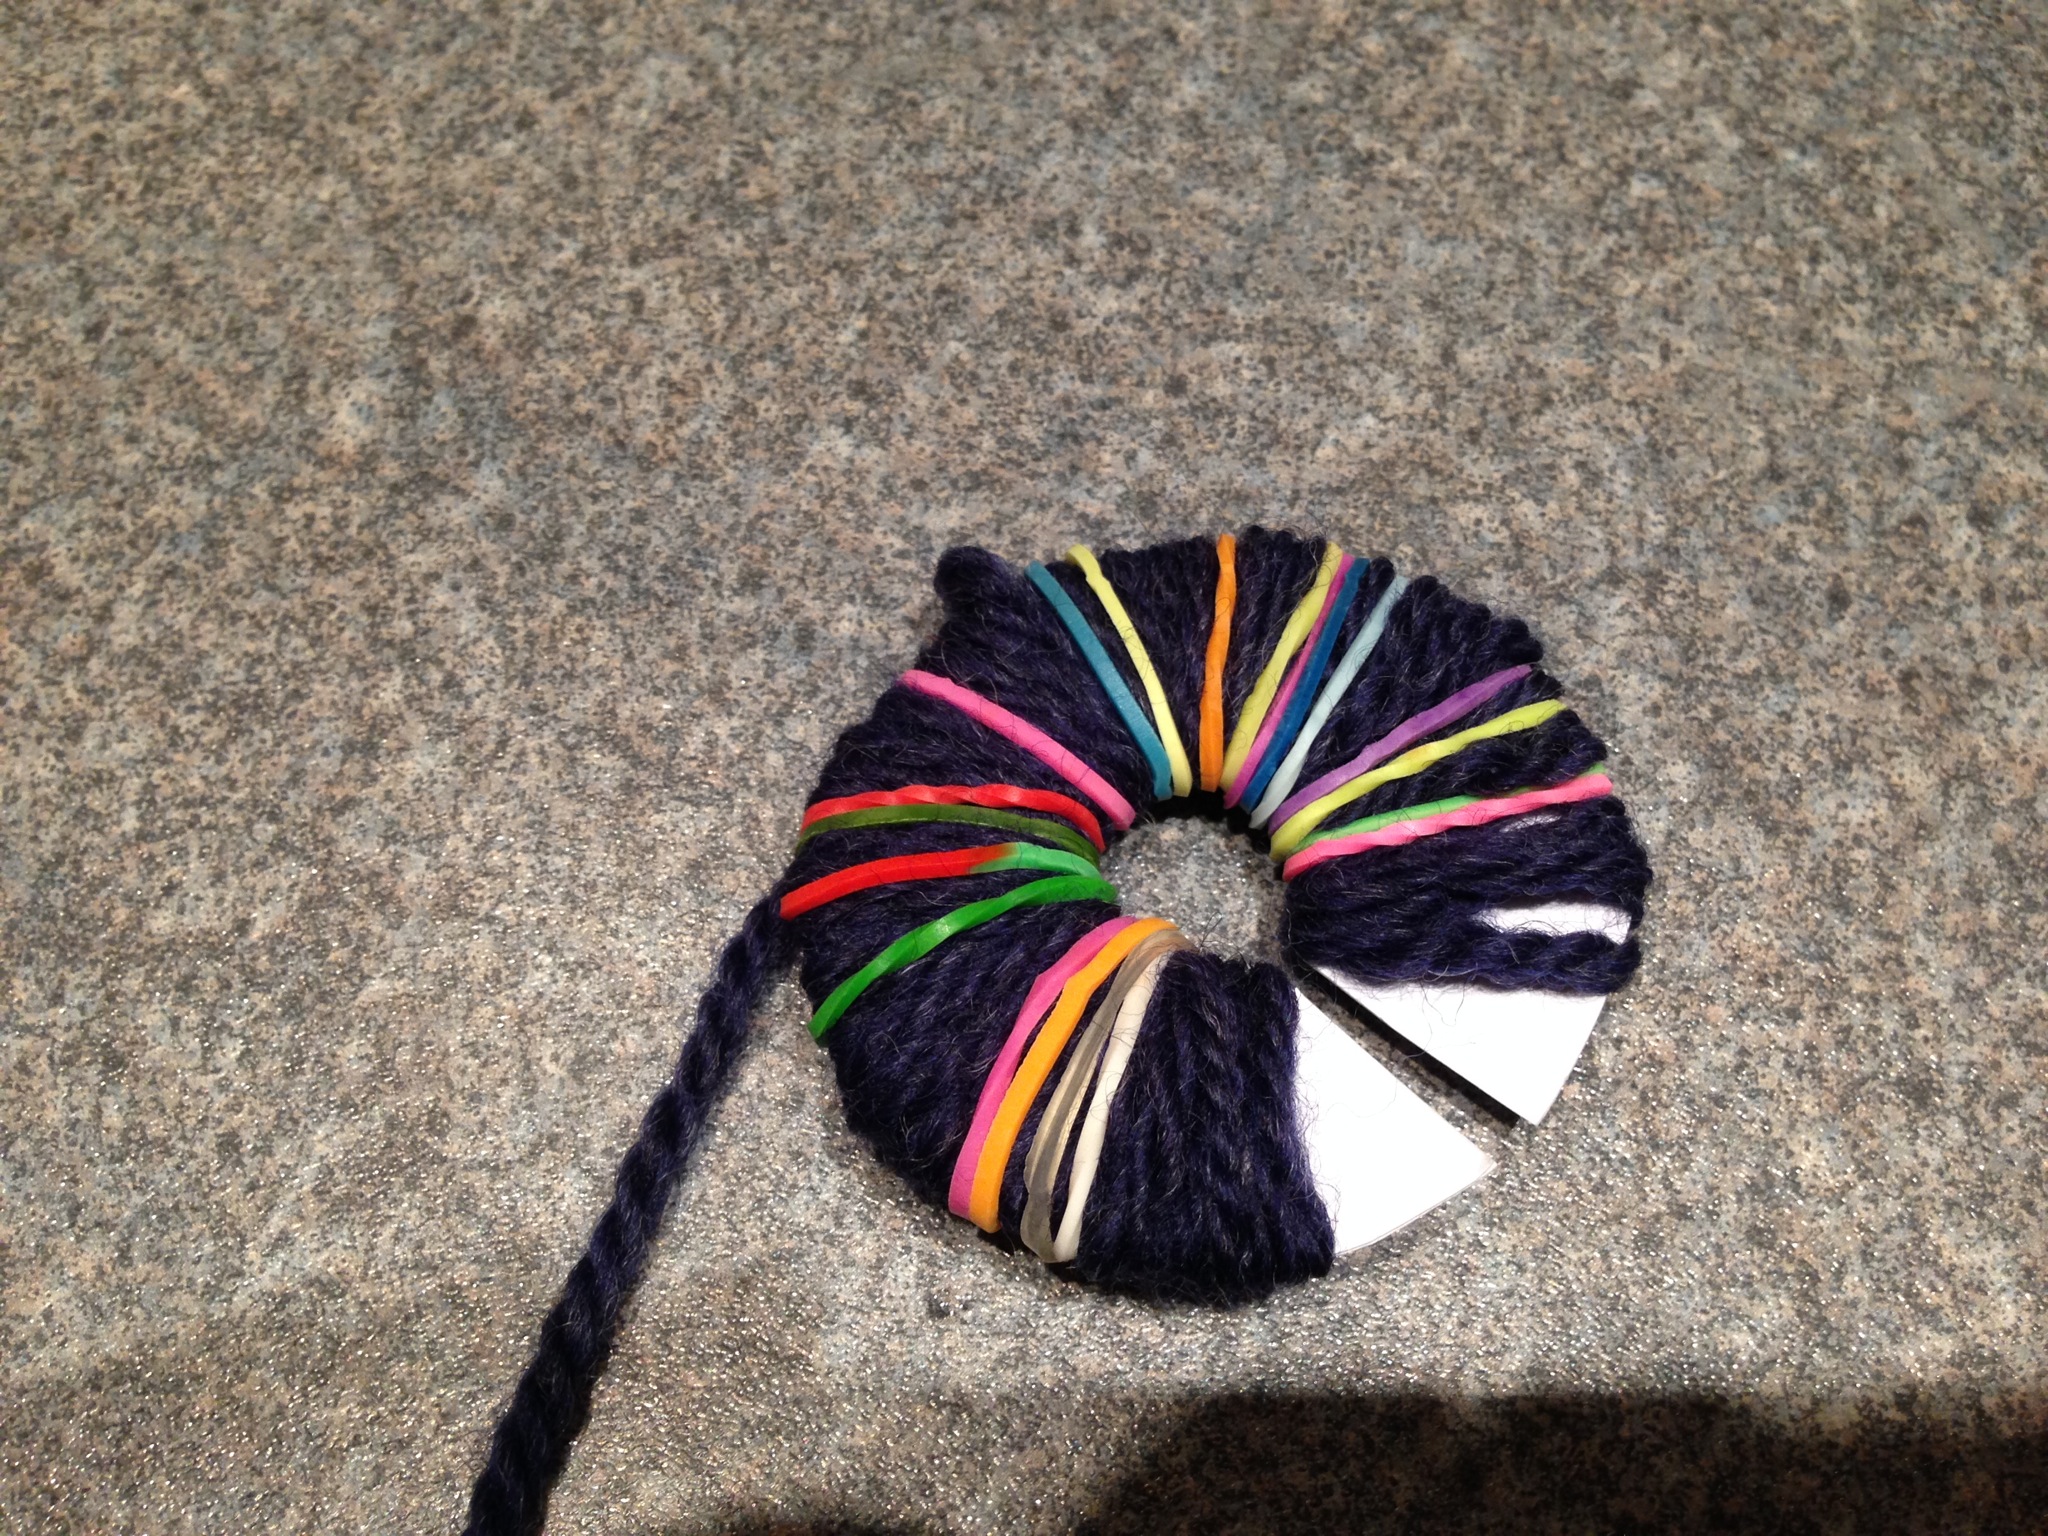
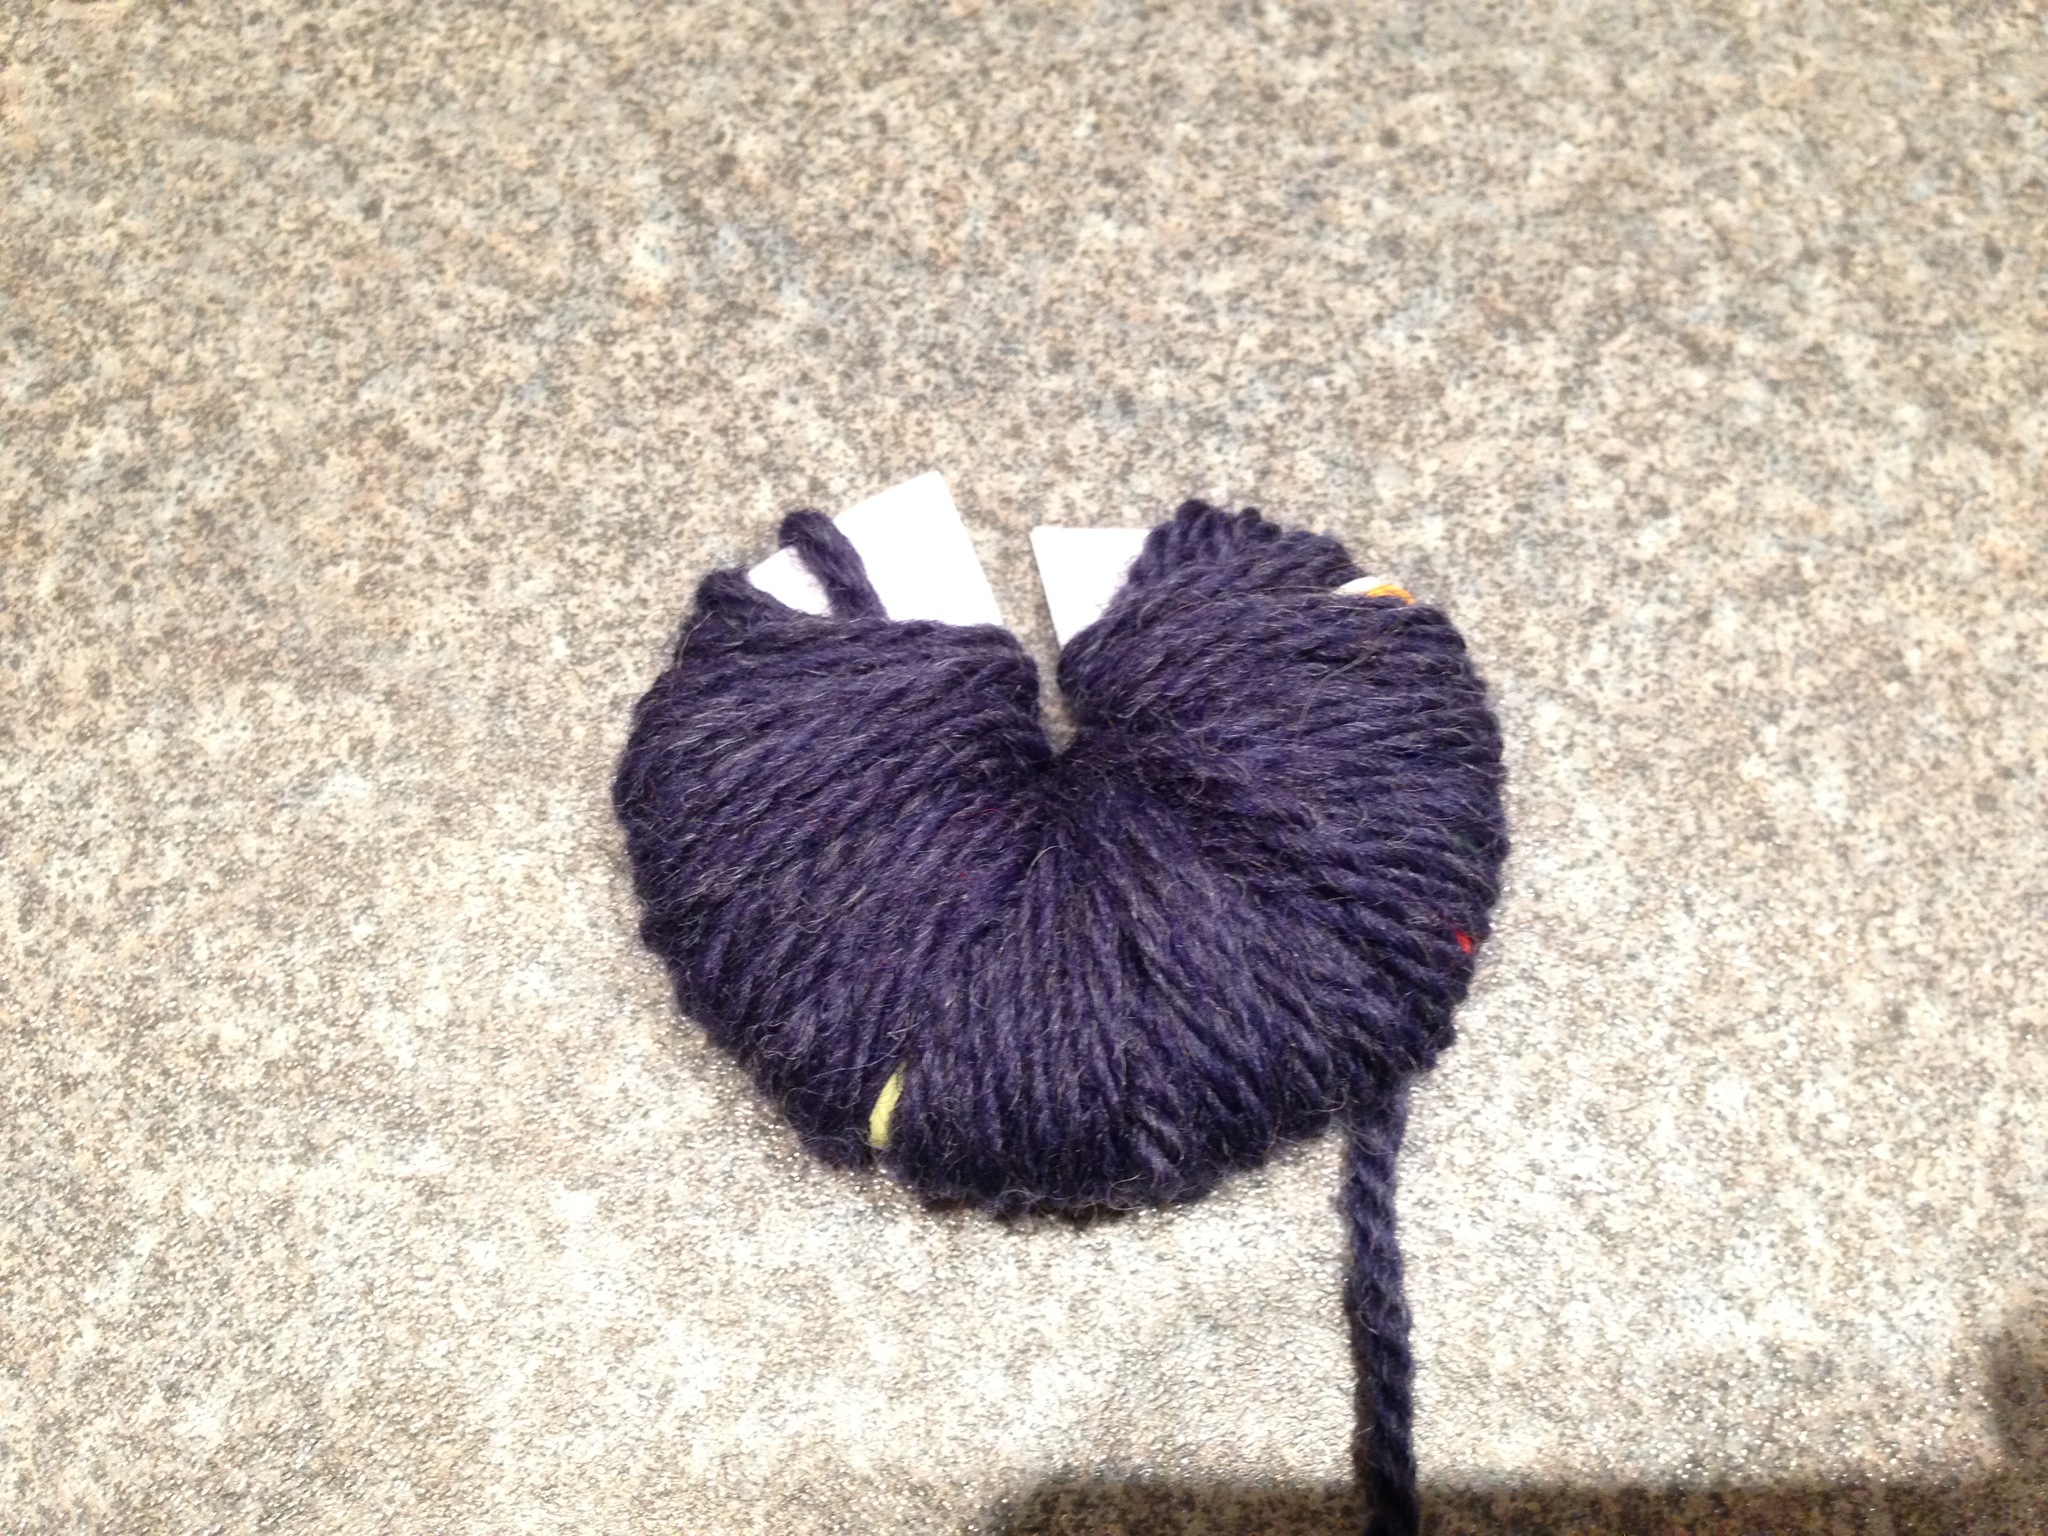
Use a pair of double-pointed needles. Cast on the required number of stitches. *Don’t turn the work, but instead push the sts back to the other end of the needle. Draw the yarn loosely across the back of the swatch. Work the next row as if it is the next round. Repeat from * for the required length of swatch. Cast off. Cut the strings at the back. Block and treat as the project is to be treated. Pin out and measure.

As with all swatches, measure across the central sts as the edge sts may be distorted.

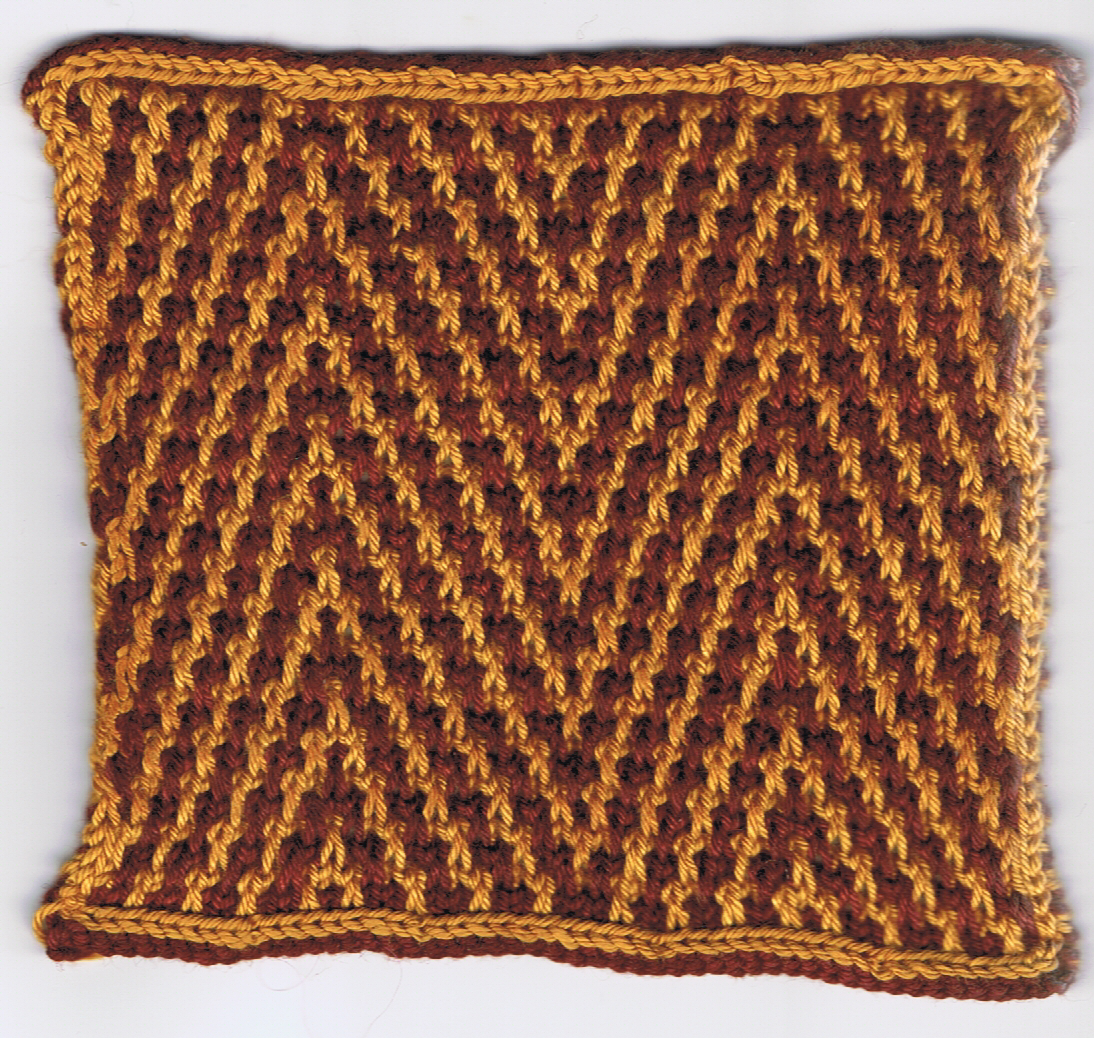
 Here are pics of a (small) swatch worked in this manner (a) from the front; (b) from the back and (c) pinned out for measuring with the strings cut.


Note, if the yarn is slippy, you may have to secure the edgemost stitches so that they don’t unravel. You can do this with a sewing machine or by crocheting the edge as you might do with a steek. It helps to have long lengths of yarn at the back.

Advertisement

Ravelry Pro Data and Excel: How to Make a Purchases by Month Chart

Hello!

A discussion on rav revealed that some designers would like to export data from Ravelry Pro to manipulate in excel and in particular, create a chart of Purchases by Month. Here I go through the steps to work up the chart yourself, and at the bottom of the page is a link to a dummy excel file you can use. If you use the dummy file, you can just pop your Ravelry Pro exported data into the Purchases tab, but going through the steps will help you figure out how to to it yourself and maybe get different data out.

  1. Export the data from your purchases page
    http://www.ravelry.com/stores/XXX/purchases

    export purchases data from ravelry pro
    export purchases data from ravelry pro
  2. Then open that in a new excel document. The date of purchase column is column A.
  3. You will need to use text-to-columns on column A to turn it into date format as just converting the data to “date” won’t work. Text-to-columns is on the data tab in my version (2010). Rename this excel sheet “Purchases”.
  4. On a new excel sheet, set up 2 columns as follows
    A B
    Month Purchases
    01/01/2010


  5. Call this sheet “Purchases per Month”. (January 2010 is an example. Best to use your first month with sales.)
  6. Put the following into cell A3, then copy and paste into the rest of column A until it shows December 2014. This formula adds one month per cell.
    =DATE(YEAR(A2),MONTH(A2)+1,DAY(A2))
  7. Put the following into B2 and then copy and paste it into the rest of the cells below it. This formula basically says “count all purchases where
    1. The “paid” column is not empty AND
    2. The date is greater than or equal to the first of the month AND
    3. The date is less than the first of the next month

    =COUNTIFS(Purchases!F$2:Purchases!F$10000,”<>”,Purchases!A$2:A$10000,”>=”&A2,Purchases!A$2:A$10000,”<“&A3)
    *Please note, this last formula only works up to 10,000 purchases, but OTOH, if you have more than 10,000 purchases, I can, for a small (teeny, weeny) fee, write a spreadsheet for you!
    **Sorry it runs off the page, but I don’t want to add spaces cos that will break the formula if the spaces are pasted too.

  8. And then to make the chart, just select the data in columns A and B on the “Purchases per Month” sheet and click on the barchart from the Insert tab.

Finally, here, for your downloading pleasure, is the mock_purchases spreadsheet.

If you use the spreadsheet, you will need to do the Text-to-columns thing in step 3) everytime you copy in the data from rav.

How to make a pom pom sprinkled with loom bands

Here’s a fun way to add some colour to your bobbles.

1. Cut out two donuts from card. Leave a slit. The inner diameter of these was 7/8″ or 2cm, and the outer diameter was 2 1/4″ or 5.5cm
IMG_0653.JPG

2. Wrap yarn around the donuts.

IMG_0654.JPG

3. Pop some loom bands on too. Distribute them roughly equally around the rings. Use about 20 bands.

IMG_0655.JPG

4. Another layer of yarn. Cover the bands.

IMG_0656.JPG

5. Another layer of bands.

IMG_0657.JPG

6. A final layer of yarn. Your pom pom is probably getting quite full now (if not, keep layering).

IMG_0658.JPG

7. The heart-stopping bit: cut the yarn and bands all the way around. Insert the scissors between the two card rings.

IMG_0660.JPG

8. Work a length of yarn in between the pieces of card and tie off tightly. Do this twice if you can. Don’t worry if a couple of lengths of yarn fall out, just get that ball tied off!

IMG_0661.JPG

9. Trim your pom pom down to size! The loom bands, being elastic, may retract a little into the ball. Try to tease them out or trim back to reveal them.

IMG_0664.JPG

10. Done!

IMG_0665.JPG

Quickly: How to make a poll on Ravelry

Oddly enough for ravelry, this is not immediately obvious.

To do this:

20140717-134549-49549502.jpg

You need to pop the following into the message box

20140717-134720-49640175.jpg

– The P in poll needs to be capitalised
– there needs to be a colon at the end of poll
– the numbers have to be at the start of each row
– there has to be a full stop after each number

More tips and tricks in this thread, which you can also use like a sandbox.

One-Row Buttonhole Video

For my Undone Capelet, I made a video to demonstrate how to perform a one-row self-reinforcing buttonhole.

The video works row 5 of the pattern, which is:

Row 5 (RS): YO, K2tog, K1, BH, K2tog, YKY, SSK,
P1, K1, P2.

So it’ll also help if you’re unsure how to work a YO at the beginning of a row.

Make your knit your own – Workshop at Puddleducks, Ardee

I am delighted to announce I’ll be running a workshop in Puddleducks in Ardee, Co. Louth on Saturday week (August 3rd).

We’ll be using Wildacres as the workshop pattern.

Wildacres
Wildacres
There are many ways to make your knits your own. First and foremost, once you understand all the information set out in the pattern, you can plan how you want to change it. The next step is to choose whether to substitute the yarn type and colour. There are also many techniques for modifying as you go or working decorations into or onto your piece. This class will go through the pattern, teaching you the standard pattern elements so you can change what you want to make it unique. We will cover:
 – Choosing yarn
 – Elements of a pattern
 – Changing it up
 – If there’s time, surface embellishments (beading & embroidery).
Wildacres is knit in the round. There will be an opportunity to learn to knit in the round if you have not tried this before.
Materials for Wildacres: leftover DK yarn and 4.5mm circular needles (80cm long) (or size required to get gauge 20sts x 28rows / 10cm over st st)
Optional: If you have them, please bring a st st or ribbed square or even an old knit that could do with some “je ne sais quoi”!
This workshop costs 45 euro and is being hosted by Clare of Puddleducks.ght lunch and refresh
A light lunch and refreshments are included in the price.
Ring Clare with any queries
+353-86-4066526
Puddleducks is a craft cafe (with lots of yummy cakes in both of the most important varieties… yarn cakes and chocolate!)
Puddleducks, Kells Road, Ardee, Co-Louth

spaces are limited and a non refundable
booking deposit of 25 euro is required.

Zebra Chevrons on the flat

By popular demand, here are the instructions for working Zebra Chevrons on the flat.

Zebra Chevron Swatch

Previously, I gave the instructions for working it in the round.

With colour A, CO 24 sts

Row 1: With colour A, [k2, sl1] 8 times.

Row 2:  With colour A, [sl1, p2] 8 times.
Row 3: With colour B, [sl1, k2] 3 times, sl1, k3, [sl1, k2] 3 times, sl1, k1.

Row 4: With colour B, p1, sl1, [p2, sl1] 3 times, p3, sl1, [p2, sl1] 3 times.
Row 5: With A, k1, sl1, [k2, sl1] 3 times, k1, sl1, [k2, sl1] 3 times, k2.

Row 6: With A, p2, [sl1, p2] 3 times, sl1, p1, [sl1, p2] 3 times, sl1, p1.
Row 7: With B, repeat Row 1.

Row 8: With B, repeat Row 2.

Row 9: With A, repeat Row 3.

Row 10: With A, repeat Row 4.
Row 11: With B, repeat Row 5.

Row 12: With B, repeat Row 6.


Repeat Rows 1-12 for length desired.

Let me know how it works for you!