Lady Lismore

One of my patterns has made it into Knitty! And I am running a KAL with prizes!

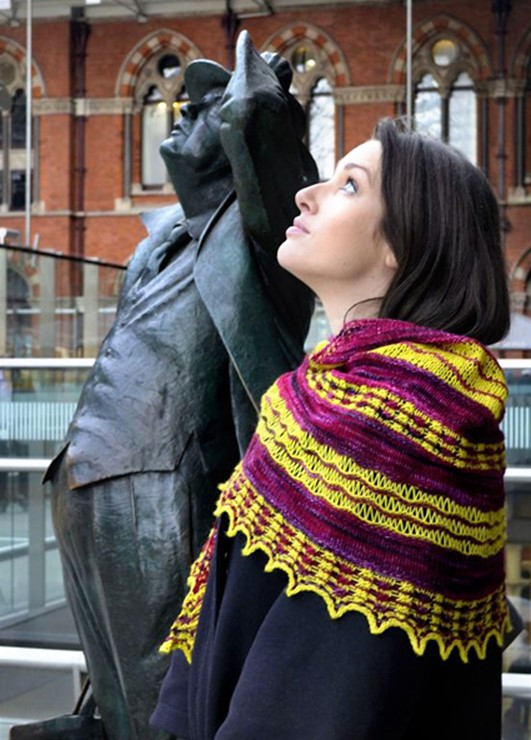
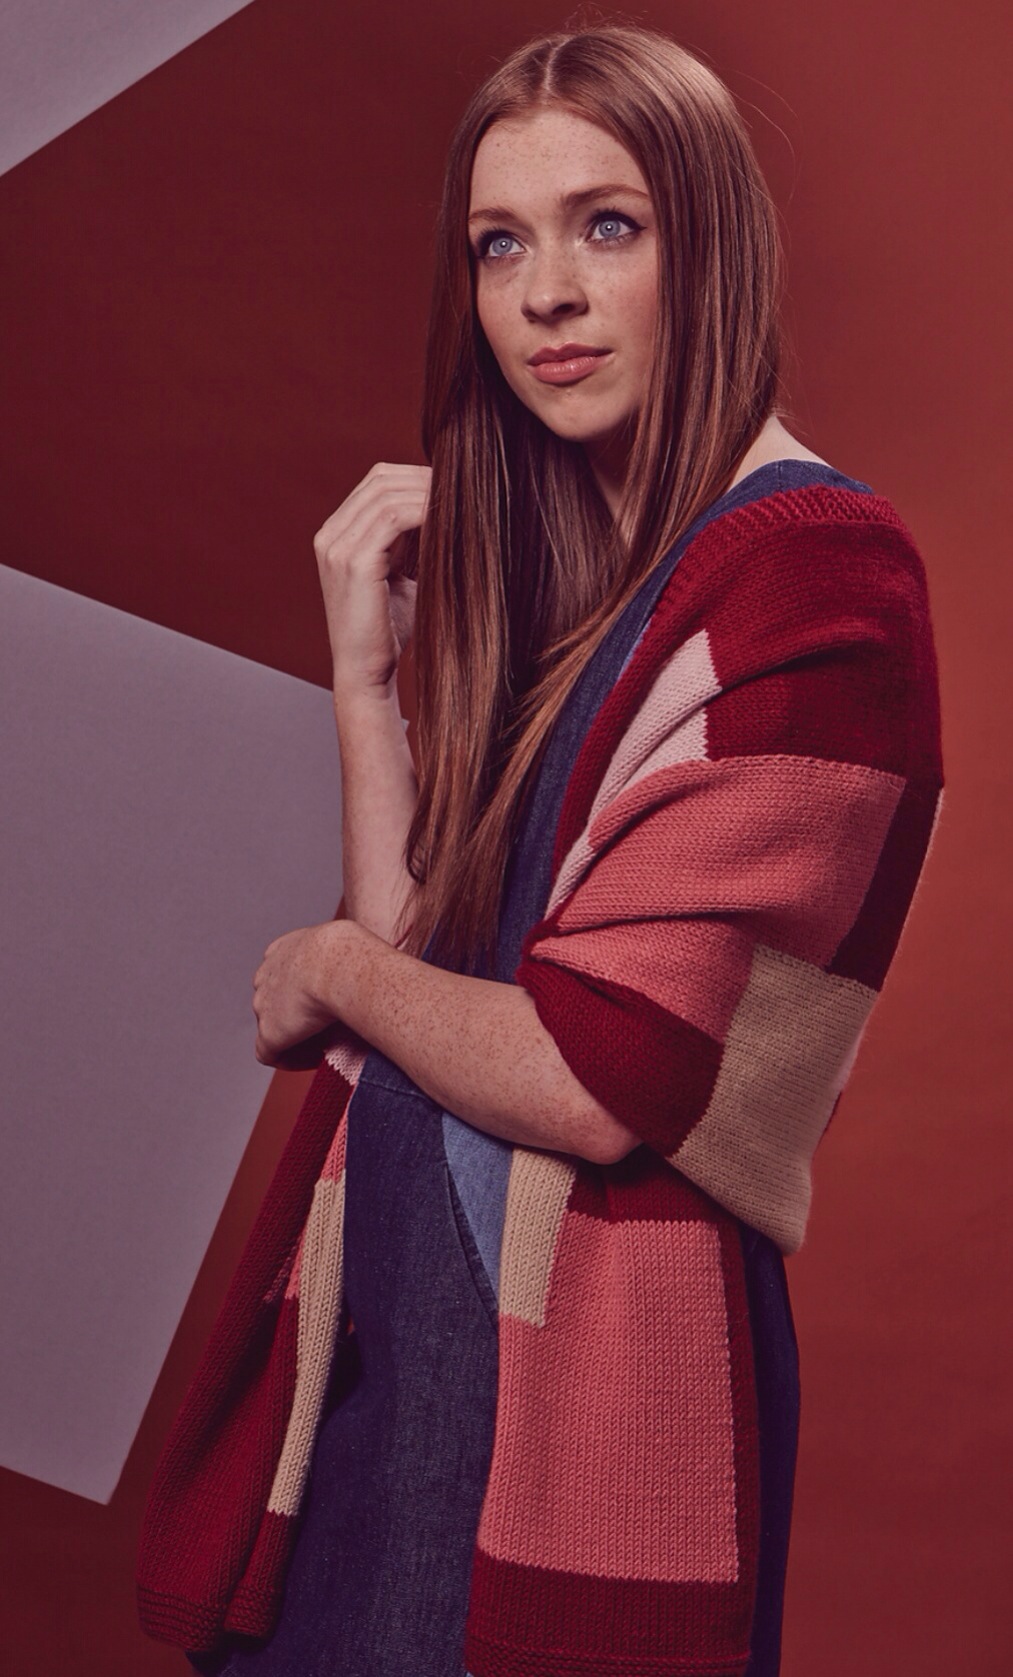
My beautiful sister models the crescent-shaped shawlette in St. Pancras station.

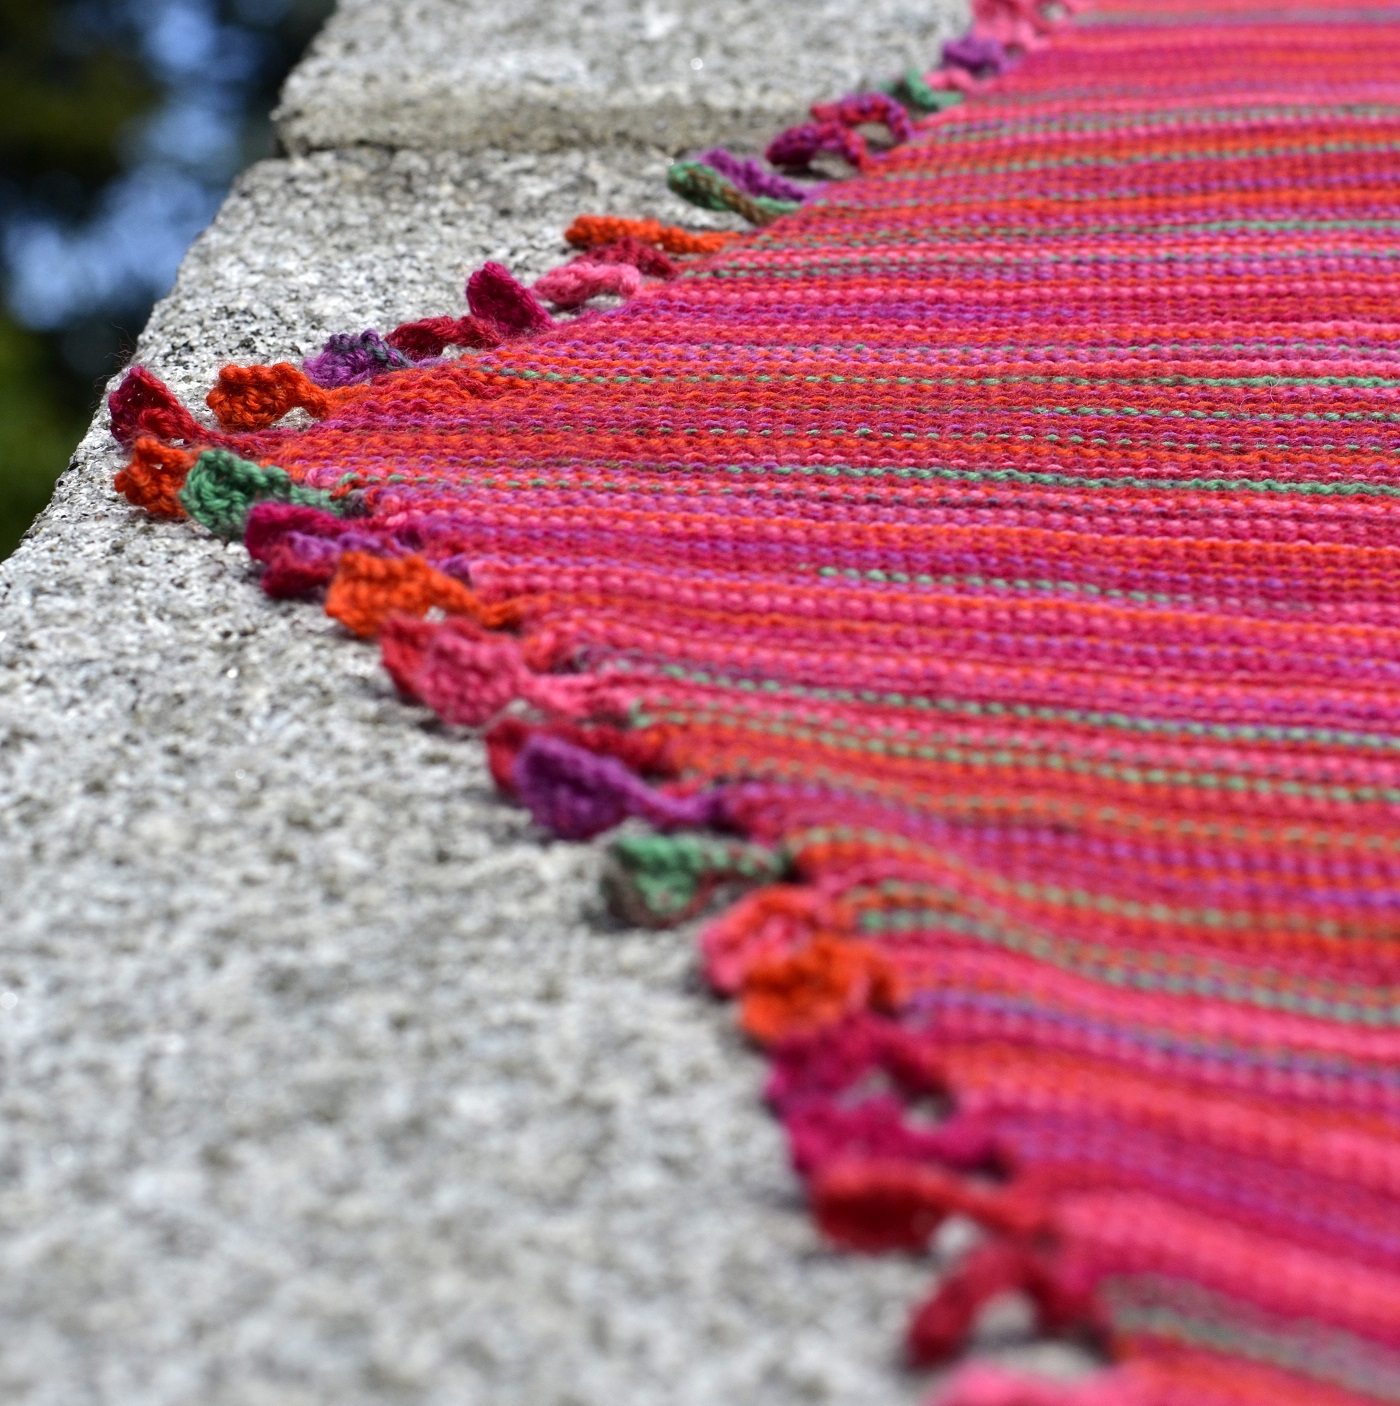
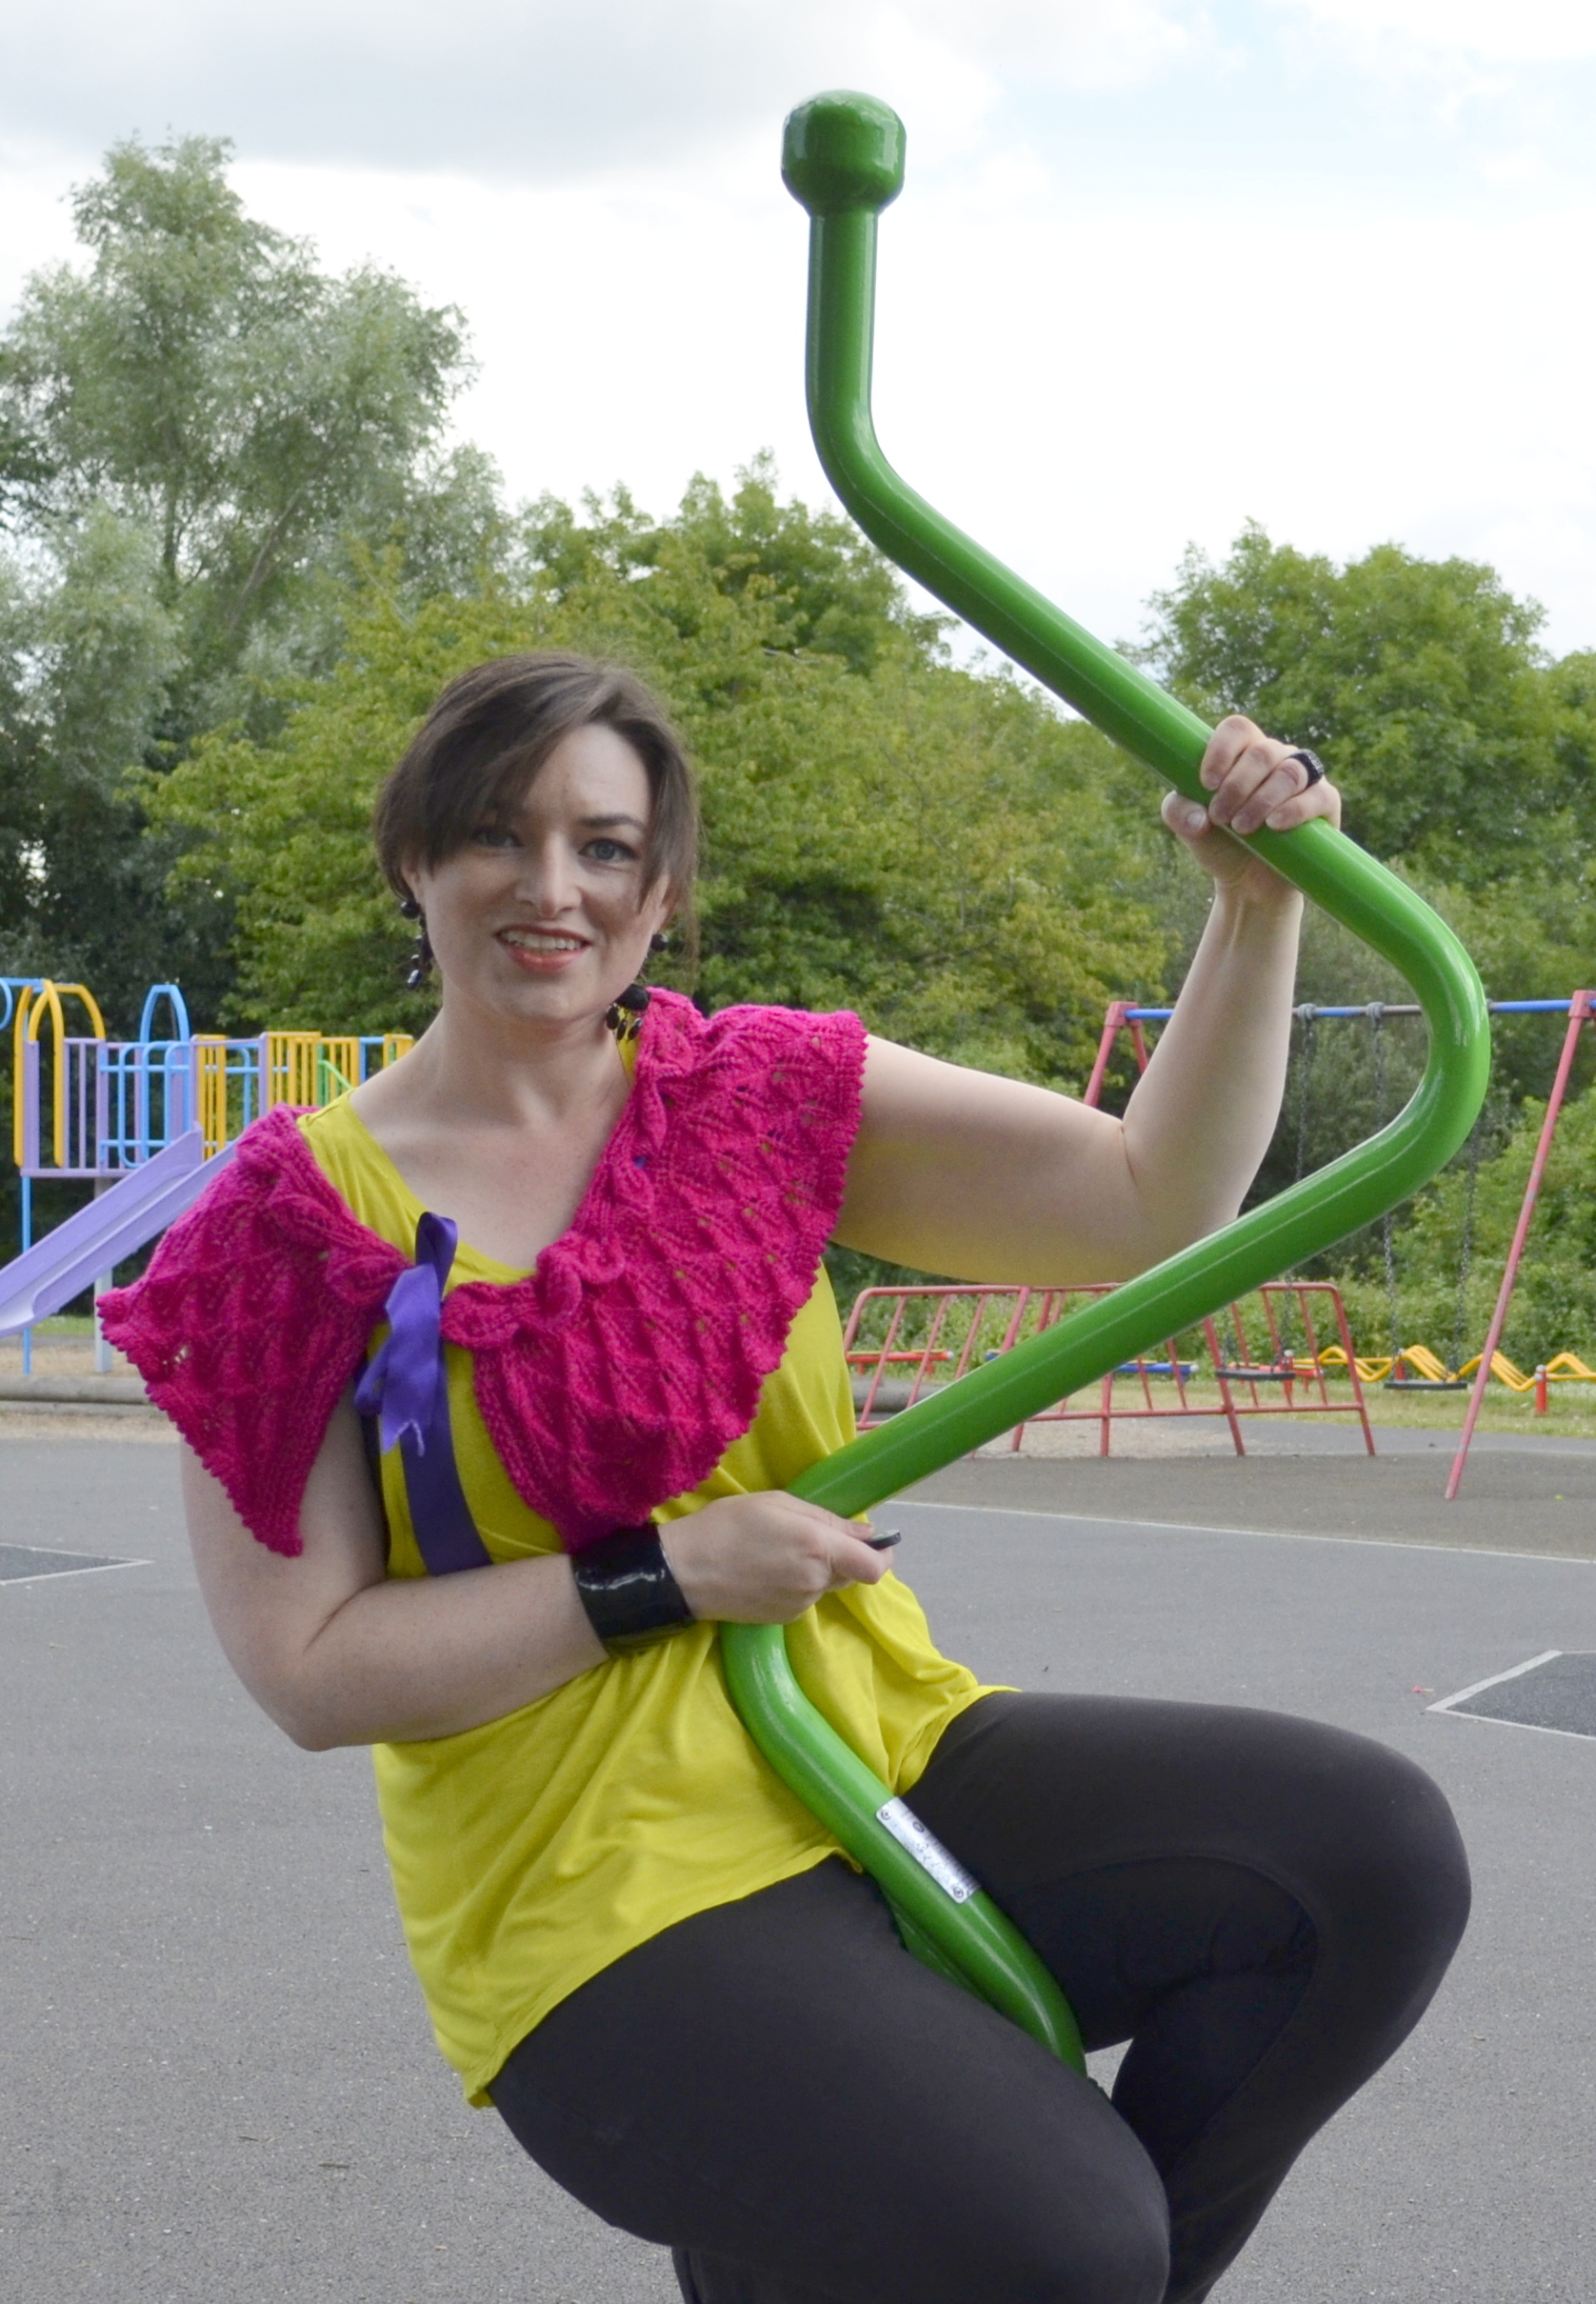
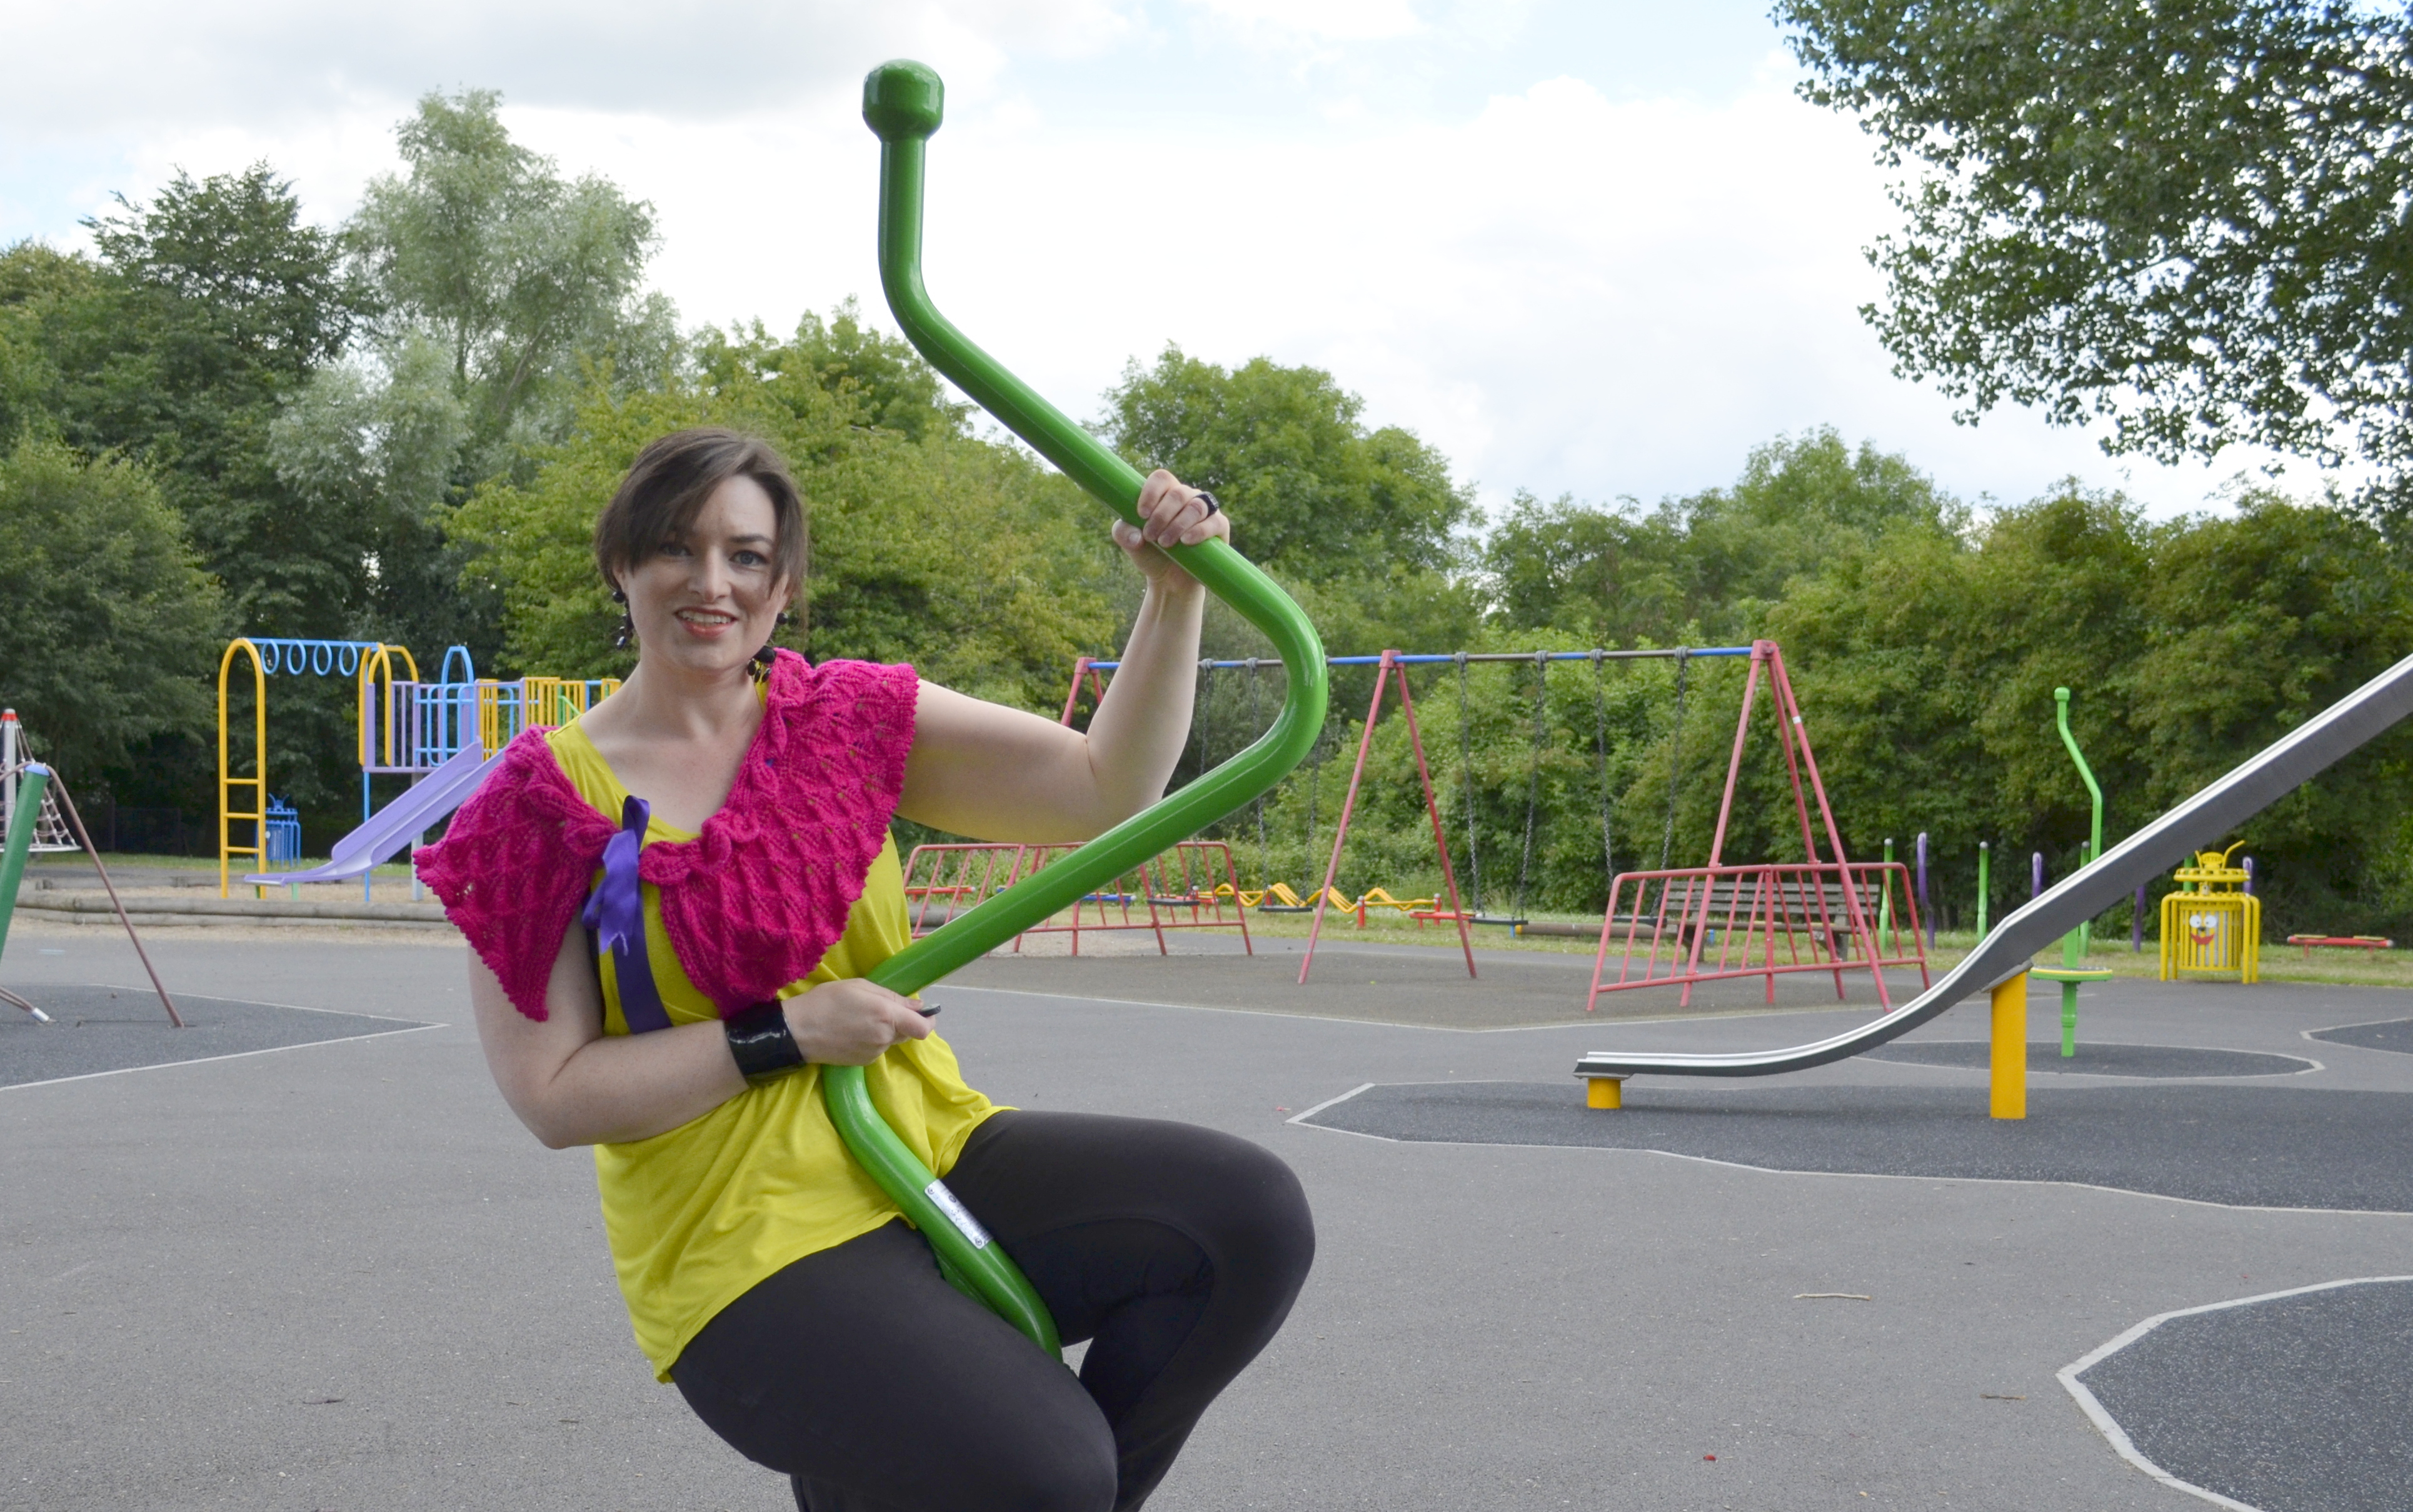
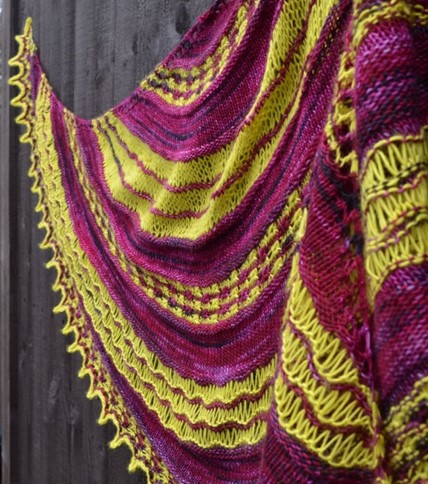
Lady Lismore features a trio of wrapped-stitch stitch patterns. Wrapping a stitch is a way to make a longer-than-usual stitch. The more times you wrap the stitch as you make it, the longer it will be. On the next row, you drop the extra wraps and just work with the elongated stitch. In Lady Lismore, different ways of manipulating the wrapped stitches give different effects. Each band of wrapped stitches is separated by some gratifyingly easy stocking stitch (stockinette) sections. Increases are at the edges only, and are consistent.

The Large sample for Knitty was worked using a variegated purpley-red and an almost-completely-solid grellow.

Dragonfly Fibers Pixie 4-ply [100% Superwash Merino; 475m/4oz skeins]
[MC] Redbud; 1 skein
[CC] Weaverknits Grellow; 1 skein

The above Large shawl used up less than 100g (422yds/386m) of MC and 61g (256yds/234m) of CC.

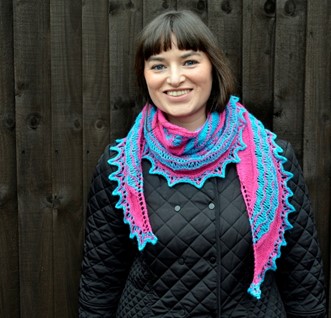
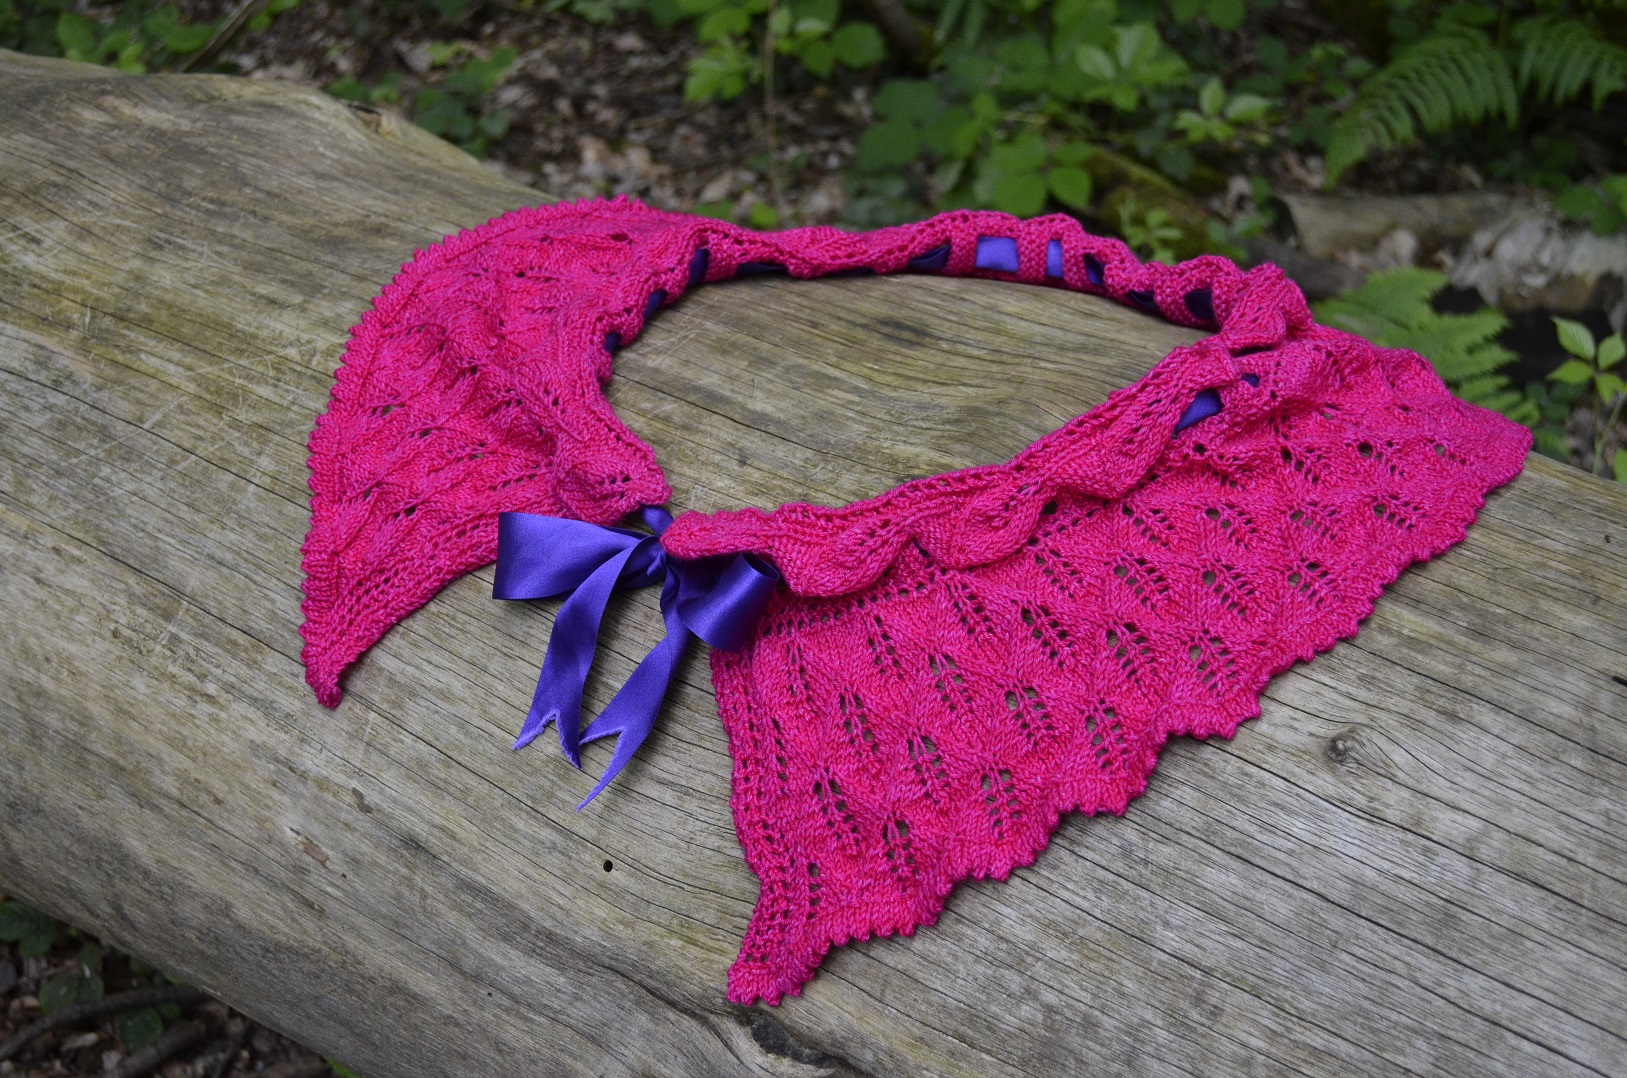
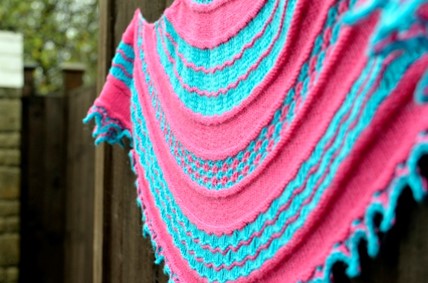
I originally worked up the Small shawl in electric blue and shocking pink.

West Yorkshire Spinners Signature 4-ply [40% Wool, 35% Blue Faced Leicester, 25% Nylon; 400m/100g balls]
[MC] Sarsaparilla; 1 ball
[CC] Bubblegum; 1 ball

In fact the Small shawl used about 80g (350yds/320m) of MC and 40g (175yds/160m) of CC.

Now for the KAL info

If you would like to join the Lady Lismore KAL, it starts on May 1st and you can sign up here. There will be some great prizes, including yarn, pattern vouchers and a handknit Loom Band Hat by me.

Start Date: May 1st – this should give everyone enough time to source yarn and materials 
End Date: July 20th – this will give me enough time to wrap up the competition before my kids go on school holidays! 
How to enter: Sign up by introducing yourself and showing or describing the yarn you’d like to use 
Prizes: To be announced, but categories will include

  • Most “loved” – as voted by people reading the FINISHED!!! thread (automatically entered by signing up below)
  • Most “helpful” – as voted by clicking the “helpful” button on the project pages (automatically entered by signing up below)
  • First to finish – no cheating! If you’re entering this category, we need to see a pic of your unused yarn next to a date (on or after May 1st) in a newspaper or in a bank or similar (entry by posting date pic on your project page and signing up below, first to post a project with pics in FINISHED!!! thread wins)
  • Best riff – I just love it when people take an idea of mine and really make it their own, whether by changing up the colours, changing the shape, adding beads, shells, whatever – I will pick a handful and then ask for votes (entry by signing up below and stating your intention to riff)

If this sounds like your kind of -along, then please step right this way and sign up here! I’m so excited to see what you do!

Please ask questions if you have them, pop ’em into a comment below.

Xxx Elanor

A Card for Valentine’s Day

I made a Valentine’s Card for my lover, and I’m pleased enough with the result that I’d like to share it with you. Since it’s me making it, it’s partially knitted, of course!

Photo 29-01-2015 10 31 20
Finished Card

Yarn
Easyknits.co.uk Deeply Wicked in Mulling (about 10g required)
100% Superwash Merino
400m/100g skein

Needles
One pair of 2.25mm needles.
Cable needle

Measurements
The finished motif is 9.5x9cm (3.75×3.5in)

Notes
All measurements are given horizontal width first, then vertical length.

Non-Knitting Materials Required
I bought my materials from Hobbycraft, but you’ll find similar products in most good stationers
1 A5 blank greetings card with pre-cut window
(If you want to make one yourself, cut some card to 44x21cm (17.25×8.25in), fold into thirds, and cut a window 9.5x12cm (3.75×4.75in) into the central panel.)
1 sheet decorative card (from the papercraft/scrapbooking aisle)
Scissors
Scalpel
Ruler
Stick glue
Glue dots
Optional: Computer & printer for interior motto

Photo 29-01-2015 11 42 54
The back of the card with sunlight streaming through.

Abbreviations
Cdd: Slip next 2 sts knitwise, knit next st, pass 2 slipped sts over
CN: Cable needle
K: Knit
K2tog: Knit 2 sts together at the same time
LDC: Slip 1 st onto a cable needle, ssk from LH needle, K1 from CN
LH: Left hand
P: Purl
RDC: Slip 2 sts onto CN, K1 from LH needle, K2tog from CN
RS: Right side
Sl: Slip
Ssk: Slip 1 st knitwise, slip a second st knitwise, insert LH needle into front of 2 sts just slipped and knit together
St(s): Stitch(es)
WS: Wrong side
Yo: Yarn over

My lover and I skipping stones on Killiney Bay once upon a time.

Instructions
Cast on 33 sts.
Rows 1 – 7: Knit.
Row 8 and all WS rows to Row 38: K4, P25, K4.
Rows 9 & 11: Knit.
Row 13: K15, K2tog, Yo, K16.
Row 15: K14, K2tog, Yo, K, Yo, Ssk, K14.
Row 17: K13, K2tog, Yo, K3, Yo, Ssk, K13.
Row 19: K12, K2tog, Yo, K, Yo, Cdd, Yo, K, Yo, Ssk, K12.
Row 21: K11, K2tog, Yo, K7, Yo, Ssk, K11.
Row 23: K10, K2tog, [Yo, K, Yo, Cdd] twice, Yo, K, Yo, Ssk, K10.
Row 25: K9, K2tog, Yo, K11, Yo, Ssk, K9.
Row 27: K8, K2tog, [Yo, K, Yo, Cdd] 3 times, Yo, K, Yo, Ssk, K8.
Row 29: K8, LDC, Yo, K3, Yo, K2tog, K, Ssk, Yo, K3, Yo, RDC, K8.
Row 31: K9, LDC, Yo, K, Yo, RDC, K, LDC, Yo, K, Yo, RDC, K9.
Row 33: K11, P3, K5, P3, K11.
Row 35 & 37: Knit.
Rows 39 – 45: Knit.
Cast off.

This motif is also charted in full. Read RS rows from right to left, and WS rows from left to right.

ValentinesCard

Block gently, following the care instructions on ball band. Weave in ends.

Photo 29-01-2015 09 33 56
Assembling the greetings card

1. Take the decorative card and cut a piece 13.5x15cm (5.5x5in).

2. On the reverse of the card, mark out a square 6.5×6.5cm (2.5×2.5in). Centre the square on the horizontal. Position the top edge of the square 4cm (1.5in) from the top of the decorative card. Use a scalpel to cut the window from the decorative card.

3. Glue the decorative card to the inside of the greetings card on the middle panel, to give a “frame-within-a-frame” effect. Take care to keep the edges straight so your frames dont look wonky!

4. Use glue dots to stick your knitted heart to the inner flap that “looks through” the window in the front of the card. Put a glue dot at each corner on the WS of knitted motif. Position it neatly at the window. Close the card, thereby sticking it to the card’s inner flap.

5. Print out a motto (save my one below, or write your own) and glue it to the inside of the card.

Photo 29-01-2015 09 37 33
Centred frames
Photo 29-01-2015 09 39 30
Use glue dots to stick the knitted motif to the card.
Photo 29-01-2015 09 42 22
The knitted motif is attached to the interior flap of the card.
Photo 29-01-2015 10 32 04
The assembled card. Note the decorative card is printed on both sides.
Download for your own use, or make up your own!

.

New pattern: Corona Beret

I have just released my Corona Beret, a slouchy, warm ray of sunshine for Winter.

IMG_0728-0.JPG

Corona Beret is available to for £3.

_DSC0553_wide

This oversized regal beret in gorgeous Skein Queen Blush yarn is slouchy, soft and warm. The interesting stitch pattern is made using just knit and purl stitches. The textured effect on this hat will look especially well under oblique winter light. From different points of view, the Corona Beret can look like a star, a crown or a flower.

The gold colour of this skein of yarn inspired this knit. The idea was to create a crown of stitches, but to emphasise the softness of the yarn I made the beret oversized and slouchy. It was only when I started the decreases that I realised the back was going to look like a multi-petalled flower. I’m delighted with the end result and I hope you are too.

Sizes

Head sizes vary widely. These measurements fit average sizes for Baby (Toddler, Child, Small Adult, Medium Adult, Large Adult).
To Fit Head Circumference
35.5 (40.5, 45.5, 51, 56, 61)cm/
14 (16, 18, 20, 22, 24)in
Finished Circumference
34 (38, 42.5, 46.5, 51, 55)cm/
13.25 (15, 16.75, 18.25, 20, 21.75)in
Finished Length (Brim to Crown)
14.5 (15.5, 19, 19.5, 23, 26.5)cm/ 5.75 (6.25, 7.5, 7.75, 9, 10.25)in

Tension

28 sts and 38 rows to 4in/10cm over stocking stitch using larger needles.

Yarn

Skein Queen Blush (4-ply (plump); 80% merino, 20% cashmere; 400m/100g skein)
Gold 1 x 100g skein

Needles and Accessories

1 set 2.75mm (UK 12/US 2) circular needles
1 set 3.25mm (UK 10/US 3) circular needles
1 set 3.25 (UK 10/US 3) DPNs

Abbreviations

DPNs Double pointed needles
inc Increase/increasing
K Knit
K2tog Knit the next two stitches together
Kfb Knit into the front and back of the same st
P Purl
Pfb Purl into the front and back of the same st
rep Repeat
Rnd Round
st(s) Stitch(es)

Splish Splash

It’s Autumn, ’tis the season for splashing about with your wellies on, catching the falling russet leaves. Add a bright splash to your outfit on dull days with a Splish Splash Shawlette.Splish Splash Shawlette

A simple garter st shawlette with a raindrop fringe. This shawlette is a great way to show off a skein of hand-dyed or self-striping yarn. The pattern is easily memorisable, so you can take it to the pub or work it up in front of the TV. It widens slowly, which makes it long and narrow, perfect to wrap around your neck a good few times and stop up any gaps the rain might find.

for £3.00

Sizes

Size will vary depending on your tension and the amount of yarn you start with. The sample measures 26cm at the widest point, and the wingspan is 132cm. It was made with 2 balls (100g) of Regia 4-ply, but not to worry if you have more (or less) yarn: just increase till you have used up half your yarn, then decrease with the other half.

Yarn

Regia Colour 4-ply (4-ply; 75% wool, 25% nylon; 210m/50g balls)
Pink/Purple/Green 2 x 50g balls

Needles and Accessories

1 pair 3.25mm (UK 10/US 3) knitting needles

Tension

27 sts and 44 rows to 10cm over garter stitch pattern

Abbreviations

K: knit
Kfb: knit front and back
Rep: repeat
Rem: remain
St(s): stitch(es)

_DSC0468 (2)_a

Loom Bands in your Knitting? Whatever Next?

Hello!
You may have noticed I’ve gone loom band crackers the last little while… Well I just released a quick, fun hat pattern that incorporates loom bands into the fabric.

IMG_5578.PNG
The pattern is called simply “Loom Band Hat” and is available to download now from Ravelry for £2


To make it you need 100g Aran yarn, 300 loom bands and size 5 and 4.5mm needles. The hat is sized from baby to adult, so you can make one for everyone in the family, not just your staker-boi niece!

I made a video showing how to knit with loom bands and the other day I uploaded a photo tutorial on how to make a wool and loom band pom pom.

I’d love to see what unusual things you do with loom bands. Post below by September 5th and I’ll pick a winner of a free copy of the pattern.

Xxx e

My name’s King, I gotta have a Crown Pattern!

I know there are a thousand crown patterns out there, but I didn’t find the exact one I needed on a Ravelry search, so I made up my own.

Simple Crown

This crown is worked sideways on.

First, measure around the kid’s head at the widest point. [My two have enormous heads for wee ones: 21 inches (53 cm)]. You’ll need to make the crown approximately 2 inches (5 cm) shorter than your measurement so that the FO sits on snugly, but not too tight.

  • Height of crown: 1.25in/3cm to 2in/5cm at point
  • Width each repeat: 2in/5cm
  • Yarn: Rico Essentials Merino (DK; 100% wool; 120m/50g ball) in shade #65 (yellow)
  • Needles: 4mm
  • Buttons; one for each point. Sample used 9.
  • Abbreviations are given below the pattern text

Crown Closeup

Pattern

Cast on 7 sts.

Row 1 (WS): Purl.
Rows 2,4,6,8 and 10 (RS)
: K to last st, M1, K1. 1 st inc each time; 12 sts after Row 10
Row 3 and all WS rows to Row 19: Knit.
Rows 12,14,16,18 and 20: K to last 2 sts, K2tog. 1 st dec each time; 7 sts after Row 20

After Row 20, start again at Row 1 and repeat until the crown is long enough to go around your child’s head. I did 9 repeats and mine ended up being about 18in long, which was perfect for the Kings junior!

Then just sew up the ends and add some buttons or beads.

Abbreviations (given in order used)

  • WS – Wrong side
  • RS – Right side
  • K – Knit
  • st – Stitch
  • M1 – Make 1 (use whichever method you prefer)
  • inc – Increase(d)
  • K2tog – Knit 2 together
  • dec – Decrease(d)


Released: Undone Capelet

undone capelet

I have released a new pattern! This is a pretty little capelet that only needs one skein of yarn (1 skein for sizes S & M; L needs 2). You can easily grow it if you have more yarn available. The capelet ties closed with a ribbon. The ribbon is woven through the collar with the clever use of one-row buttonholes. Here’s the ravelry link.

undone capelet
undone capelet

The capelet is pretty enough to wear to a wedding, but I have found myself wearing it whenever I just want something to throw over my shoulders. The colour is so punk it jazzes up my outfits without going too girly. The yarn is Uncommon Everyday in POW! by The Uncommon Thread.

Available to buy now for £3

_DSC0163 _DSC0175 _DSC0177

If worked up in cotton to a longer length (800 yds 4-ply), it could also double as a beach skirt. I would also love to see how it turns out with a contrasting colour collar.

If you want to knit it up with a contrasting colour collar or as a beach skirt & can put pics on rav, drop me a line and I’ll send you a free copy.

Mwah!
– Elanor

Undone_1_a

Apples and Pears Stole

Knit Now 31 has 2 of my patterns in it; Biennial Jumper and Apples and Pears Stole.

20140207-095322.jpg
(Photo (c) Practical Publishing by Dan Walmsley)

This is knit in an alpaca/merino mix, which means it’s lovely and warm and has great drape. The yarn is Rooster Almerino DK available from laughinghens.com.

This stole was a very easy knit, if large. The pattern is completely predictable and memorisable, there’s no shaping and it’s all stocking stitch except for the garter stitch border. The “stairs” divide the pattern into sections, so you can easily see how much progress you’re making. For some reason, I find that knits with clearly defined sections go much faster than knits that just say “keep going until it’s x long” – perhaps because I keep getting out the tape to measure it!

Here’s a pic of it blocking so you can see it full-length.

20140207-094544.jpg

This is a great project to practise intarsia. There are a manageable number of yarns to work on each row – up to 4. The blocks are straight-edged, so there’s no worrying about carrying yarn or stranding, and if you have yarn to use up, there’s no reason you have to stick to the colour scheme given; you can put the colours in whatever order you like. Stashbust, anyone?

Rosabella Mitts

Peekaboo!

My Rosabella Mitts pattern is finally available to download!
They feature roses and rosebuds in stranded colourwork. The flowers are mirrored, hand to hand, and the cuffs are done with corrugated ribbing. I used Rowan Fine Tweed to make them and it’s a lovely yarn. Great texture from a slightly thick-and-thin spin, and of course, those gorgeous tweed flecks.

for £3!

IMG_2266

IMG_2286

IMG_2280

IMG_2282

rosabella mitts