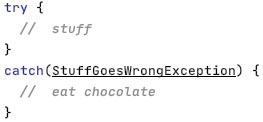
I made a Valentine’s Card for my lover, and I’m pleased enough with the result that I’d like to share it with you. Since it’s me making it, it’s partially knitted, of course!
Yarn
Easyknits.co.uk Deeply Wicked in Mulling (about 10g required)
100% Superwash Merino
400m/100g skein
Needles
One pair of 2.25mm needles.
Cable needle
Measurements
The finished motif is 9.5x9cm (3.75×3.5in)
Notes
All measurements are given horizontal width first, then vertical length.
Non-Knitting Materials Required
I bought my materials from Hobbycraft, but you’ll find similar products in most good stationers
1 A5 blank greetings card with pre-cut window
(If you want to make one yourself, cut some card to 44x21cm (17.25×8.25in), fold into thirds, and cut a window 9.5x12cm (3.75×4.75in) into the central panel.)
1 sheet decorative card (from the papercraft/scrapbooking aisle)
Scissors
Scalpel
Ruler
Stick glue
Glue dots
Optional: Computer & printer for interior motto

Abbreviations
Cdd: Slip next 2 sts knitwise, knit next st, pass 2 slipped sts over
CN: Cable needle
K: Knit
K2tog: Knit 2 sts together at the same time
LDC: Slip 1 st onto a cable needle, ssk from LH needle, K1 from CN
LH: Left hand
P: Purl
RDC: Slip 2 sts onto CN, K1 from LH needle, K2tog from CN
RS: Right side
Sl: Slip
Ssk: Slip 1 st knitwise, slip a second st knitwise, insert LH needle into front of 2 sts just slipped and knit together
St(s): Stitch(es)
WS: Wrong side
Yo: Yarn over

Instructions
Cast on 33 sts.
Rows 1 – 7: Knit.
Row 8 and all WS rows to Row 38: K4, P25, K4.
Rows 9 & 11: Knit.
Row 13: K15, K2tog, Yo, K16.
Row 15: K14, K2tog, Yo, K, Yo, Ssk, K14.
Row 17: K13, K2tog, Yo, K3, Yo, Ssk, K13.
Row 19: K12, K2tog, Yo, K, Yo, Cdd, Yo, K, Yo, Ssk, K12.
Row 21: K11, K2tog, Yo, K7, Yo, Ssk, K11.
Row 23: K10, K2tog, [Yo, K, Yo, Cdd] twice, Yo, K, Yo, Ssk, K10.
Row 25: K9, K2tog, Yo, K11, Yo, Ssk, K9.
Row 27: K8, K2tog, [Yo, K, Yo, Cdd] 3 times, Yo, K, Yo, Ssk, K8.
Row 29: K8, LDC, Yo, K3, Yo, K2tog, K, Ssk, Yo, K3, Yo, RDC, K8.
Row 31: K9, LDC, Yo, K, Yo, RDC, K, LDC, Yo, K, Yo, RDC, K9.
Row 33: K11, P3, K5, P3, K11.
Row 35 & 37: Knit.
Rows 39 – 45: Knit.
Cast off.
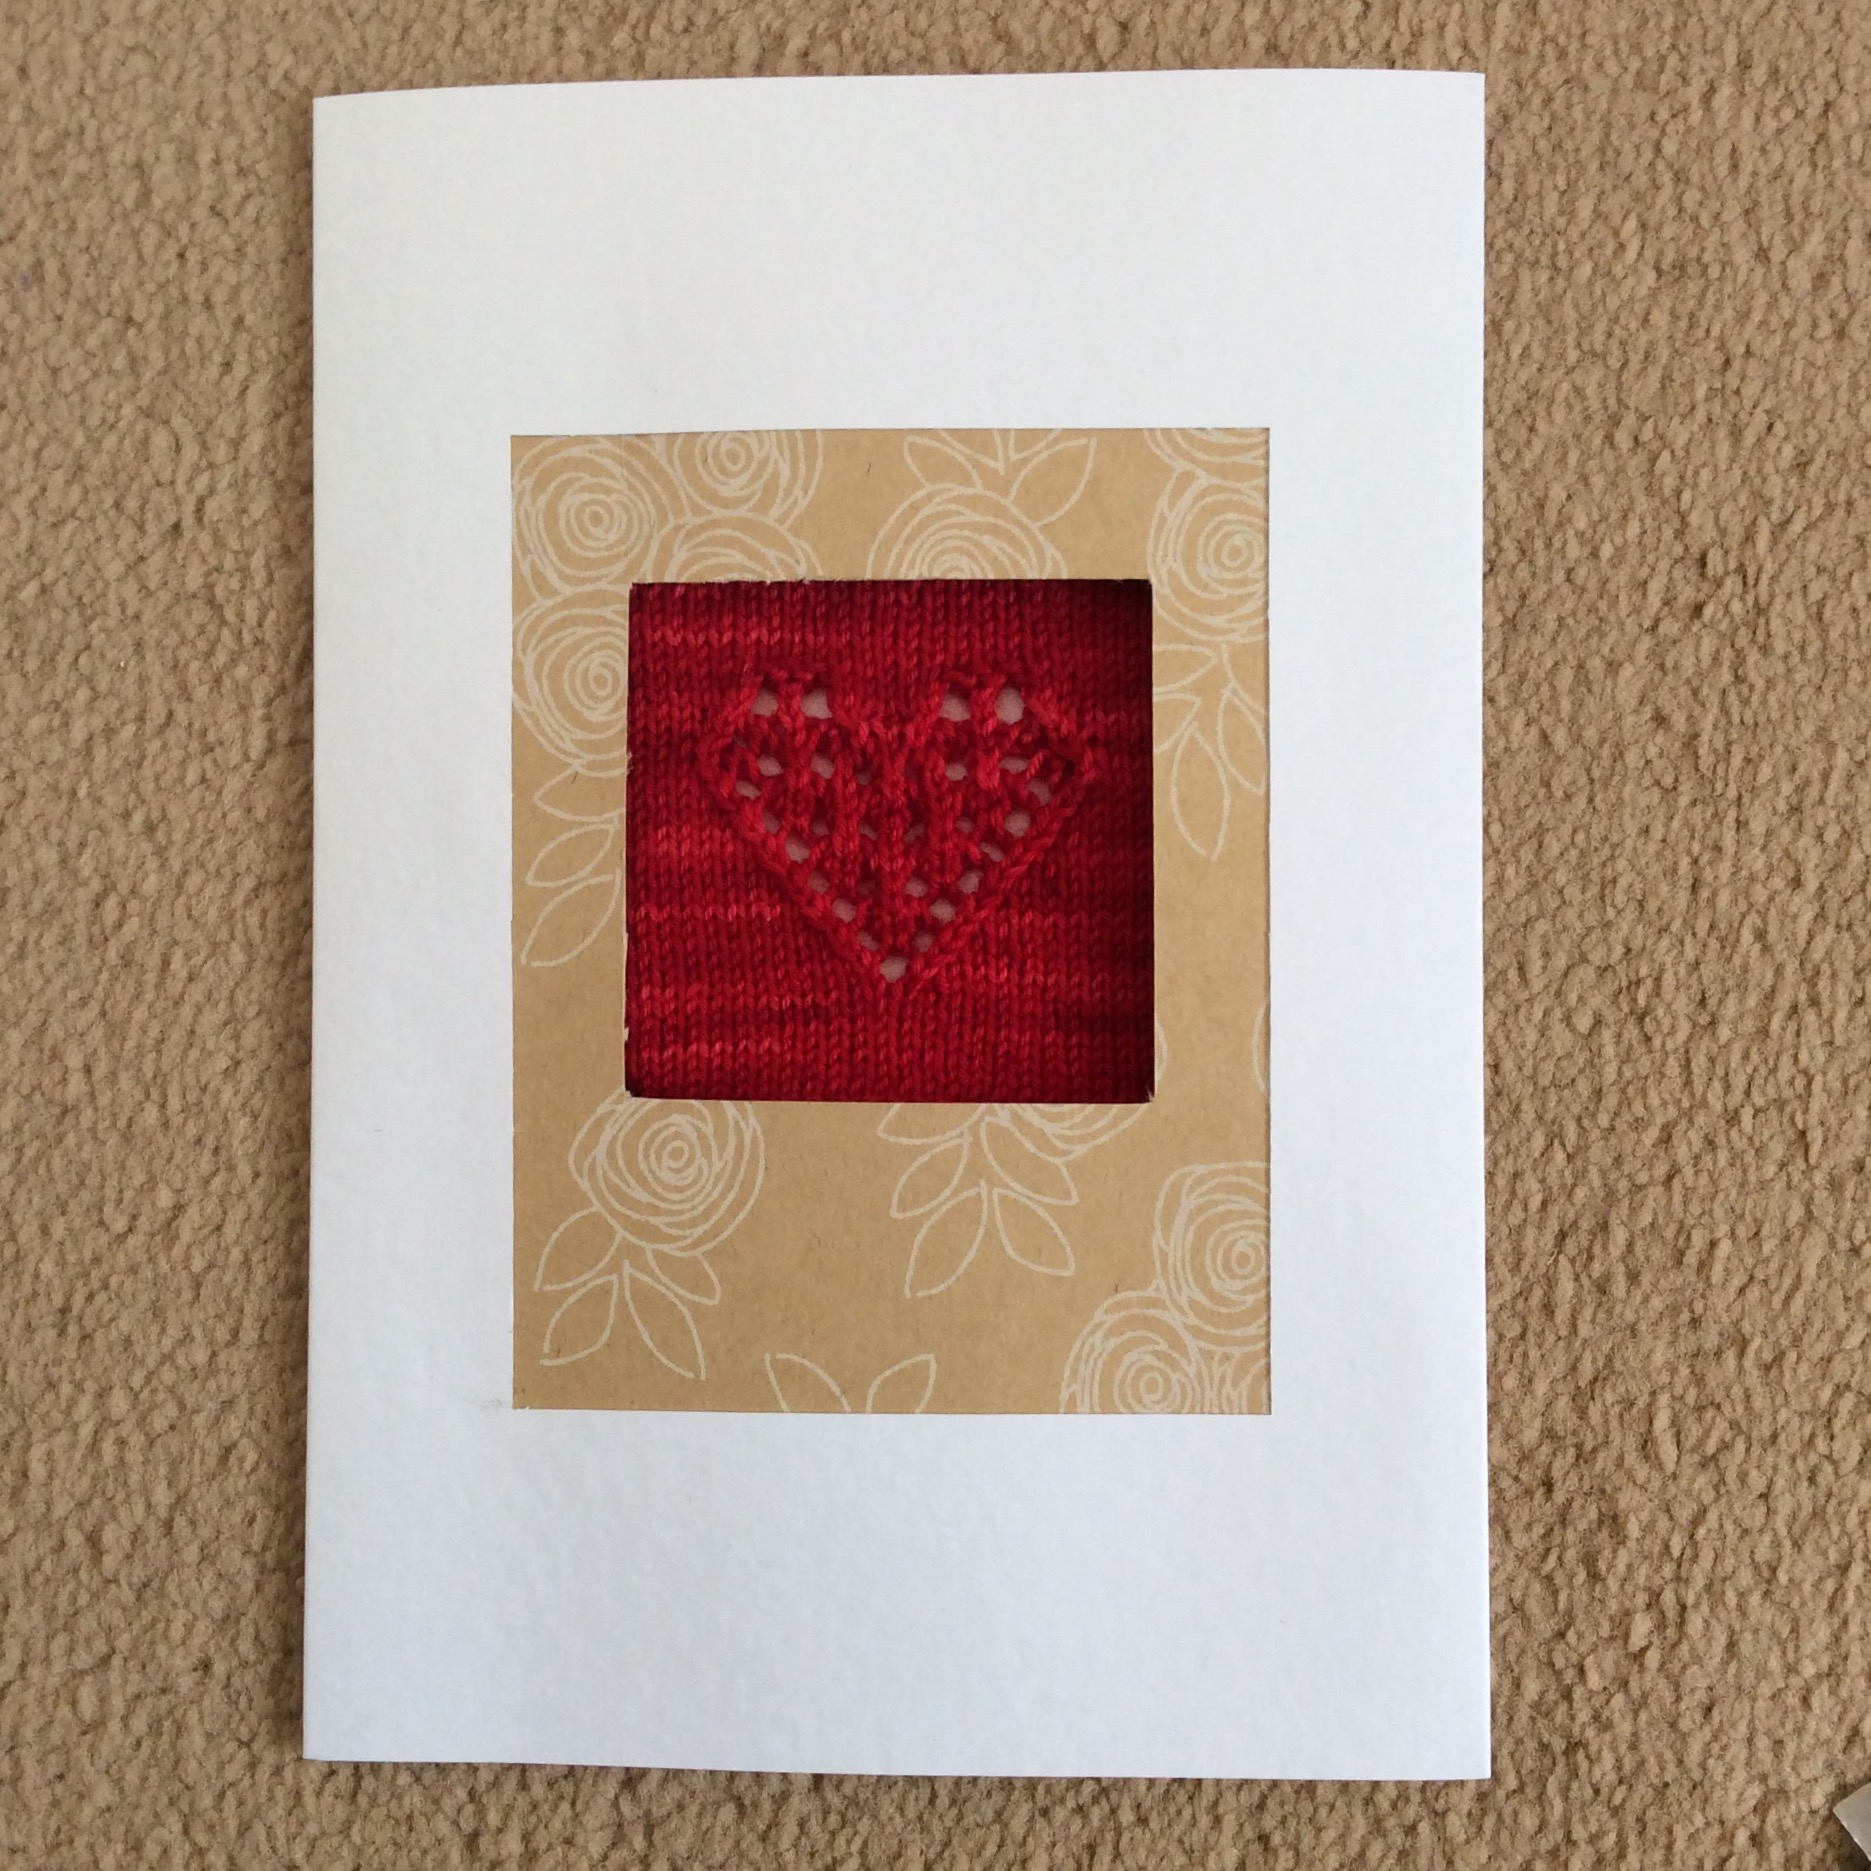
This motif is also charted in full. Read RS rows from right to left, and WS rows from left to right.
Block gently, following the care instructions on ball band. Weave in ends.

Assembling the greetings card
1. Take the decorative card and cut a piece 13.5x15cm (5.5x5in).
2. On the reverse of the card, mark out a square 6.5×6.5cm (2.5×2.5in). Centre the square on the horizontal. Position the top edge of the square 4cm (1.5in) from the top of the decorative card. Use a scalpel to cut the window from the decorative card.
3. Glue the decorative card to the inside of the greetings card on the middle panel, to give a “frame-within-a-frame” effect. Take care to keep the edges straight so your frames dont look wonky!
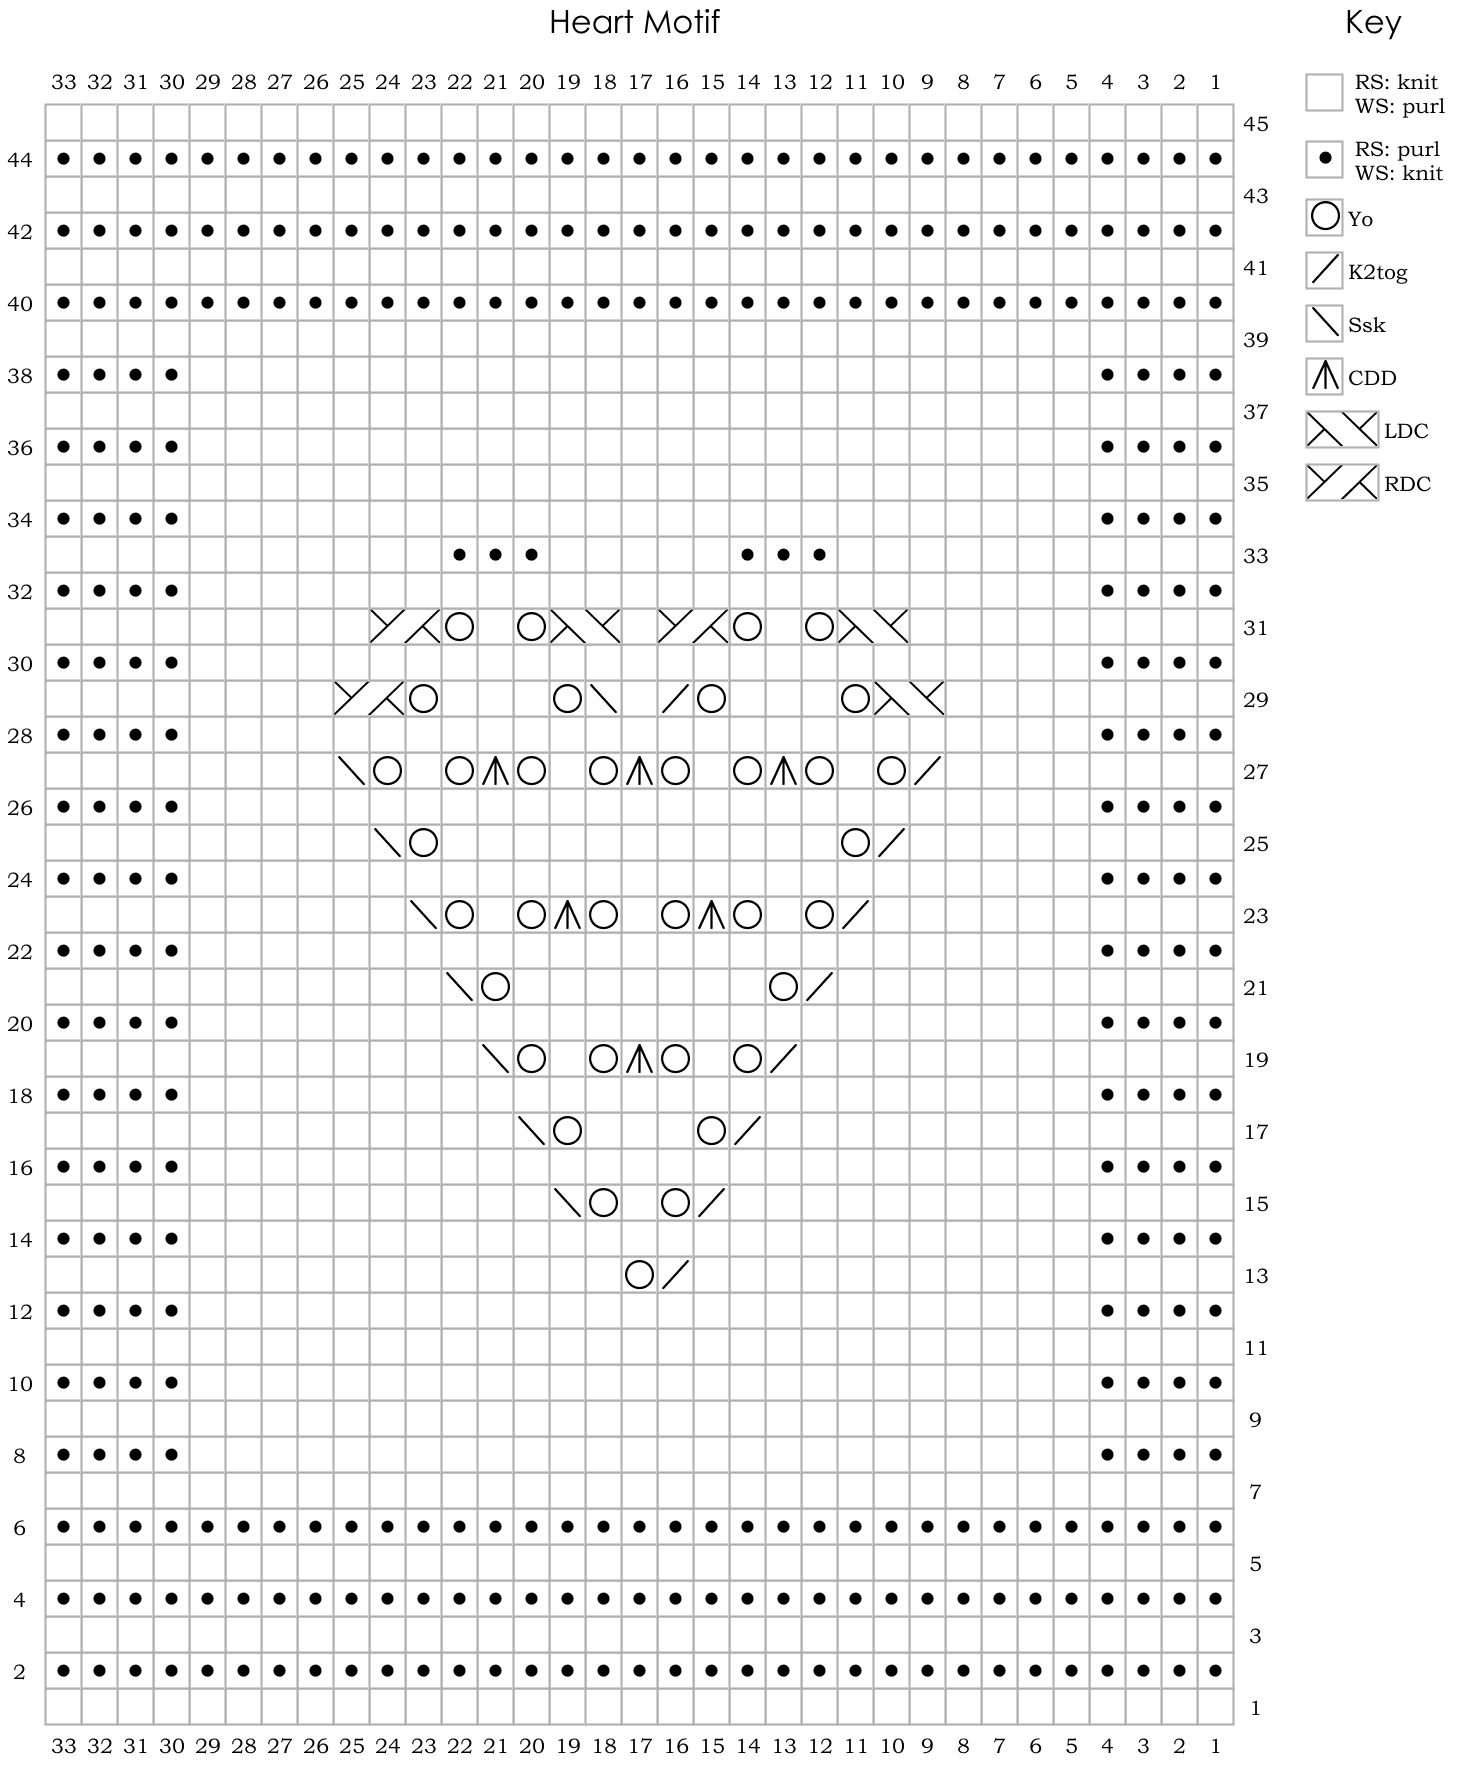
4. Use glue dots to stick your knitted heart to the inner flap that “looks through” the window in the front of the card. Put a glue dot at each corner on the WS of knitted motif. Position it neatly at the window. Close the card, thereby sticking it to the card’s inner flap.
5. Print out a motto (save my one below, or write your own) and glue it to the inside of the card.


.

One thought on “A Card for Valentine’s Day”